Never one to miss a bandwagon, Essie released their version of the nail art sticker trend a couple months ago with their Sleek Sticks.
Available in 12 patterns, each strip is UV-cured, so the colours and textures stay put for up to 10 days. The patterns feature everything from animal print, to 3-D gems, to calligraphy and lace, and so much more.
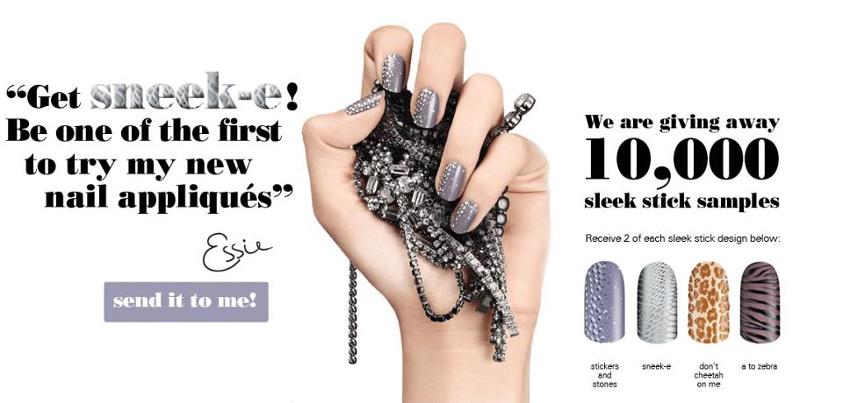
I have been a fan of the Sally Hansen nail strips for a while and considering the price of the Essie ones, I was just going to pass (I like switching up my nail polish every few days anyways), but then I saw on their Canadian Facebook page that they were giving away 10,000 samples, so being one to never pass up a good deal/discount/free stuff, I signed up.

From Essie Canada’s Facebook page.
The sample included two stickers each from four designs, the idea is to create an accent nail with these, which is great because accent nails and nail art is totally in. Plus, with the Sally Hansen ones, if you wanted to do that the rest would dry out if you didn’t use them.
The designs included in the sample were Stickers and Stones, Sneek-e, Don’t Cheetah on Me, and A to Zebra. They came on a clear sheet, so you could just peel off and apply. The instructions were on the back of the card.

From Essie Canada’s Facebook page.
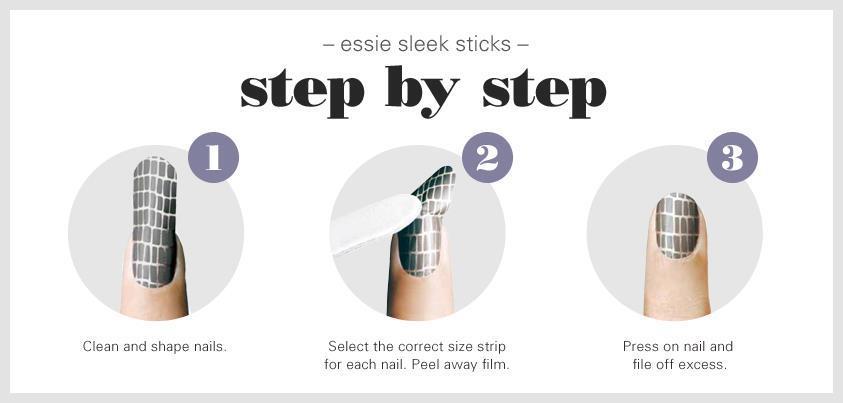
Here’s how they work:
- Ready your canvas — clean and shape your nails.
- Select the correct size sticker strip for each nail noting cuticle shape as well as width.
- Peel sticker away from the protective film. Try starting with the pinky nail – smaller is easier.
- Press sticker onto the nail, smoothing out any air bubbles, and file off the excess with the provided nail tool or file.
- Between sizes? Size up and remove excess sticker by contouring with a cuticle stick.
- You’re done! Just wait an hour before getting your hands wet so the stickers have time to adhere to your nails. For easy removal, apply essie’s apricot cuticle oil around the appliqué and simply peel off!
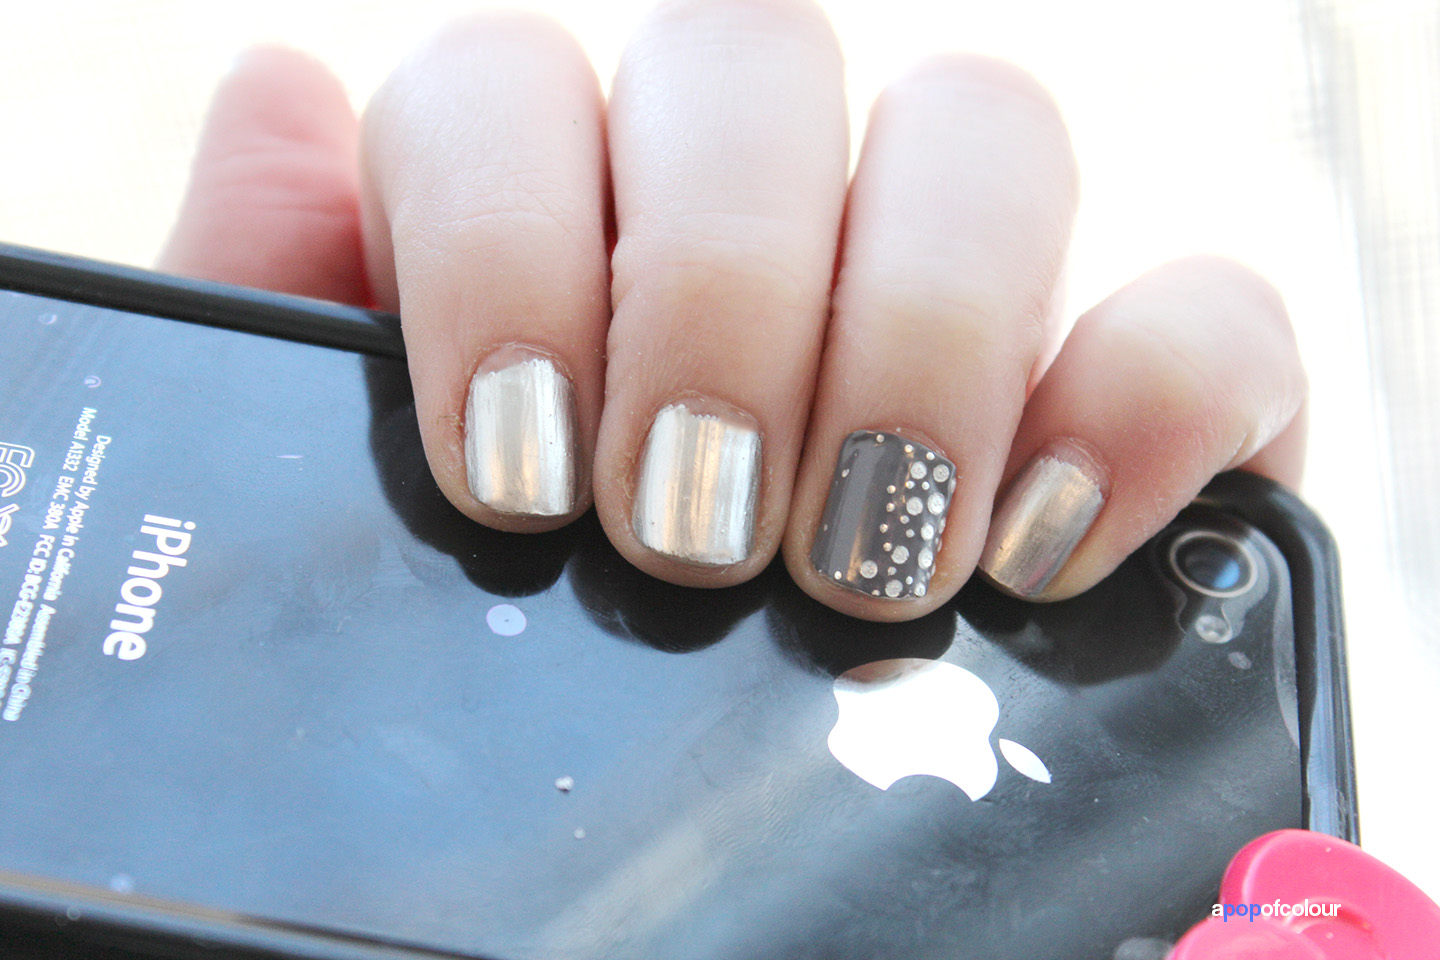
 I chose to try Stickers and Stones first because that one caught my eye first. I paired it with Essie’s No Place Like Chrome to bring out the silver detail (the purple/grey colour in the sticker really reminds me Essie’s Chinchilly by the way).
So my thoughts on them. They are definitely thicker than the Sally Hansen ones, which is something that I didn’t like. With the Sally Hansen, you just fold the excess sticker over your nail and it breaks off, leaving a clean finish. With the Essie ones, you have to fold the sticker over and then file the excess off, which left it sort of jagged and you could see the tip of my nail. The sample was also a touch too big for my ring fingers so there is excess just hanging out and I have a feeling that a cuticle stick won’t be enough to tear away the extra, so I just chose to leave it.
As for wearability, so far so good. This is my fourth day wearing them and it’s stayed on perfect, there are no rips or minor tip wear at all. I haven’t tried the other designs as of yet, but once this one no longer looks good, I’ll switch it out for a different one.
So final thoughts. I love the designs of the Essie ones, but compared to the Sally Hansen, I prefer the application of those better. These are also at a higher price point, C$12.99, so I think that you really have to love them if you want to take the plunge and try them out. Personally, I like switching up my nail polish every few days, so 10 days of wearing the same design on my nails is a little too much (plus for that much money you can buy a bottle of salon polish), but if I were going to an event or on a vacation (somewhere you don’t want a lot of high maintenance), then these would be great. I’m really glad I got to snag a sample of these through their Facebook page because wearing them as an accent is to me, the perfect way to wear them. I can still switch up my polish but keep that one nail the same, so it creates a totally unique look.
Have you tried Essie’s Sleek Sticks? What were your thoughts? Also, make sure to like Essie Canada on Facebook to score some deals. I have also gotten a free polish just by liking them.
Like what you read? Check out these related posts:


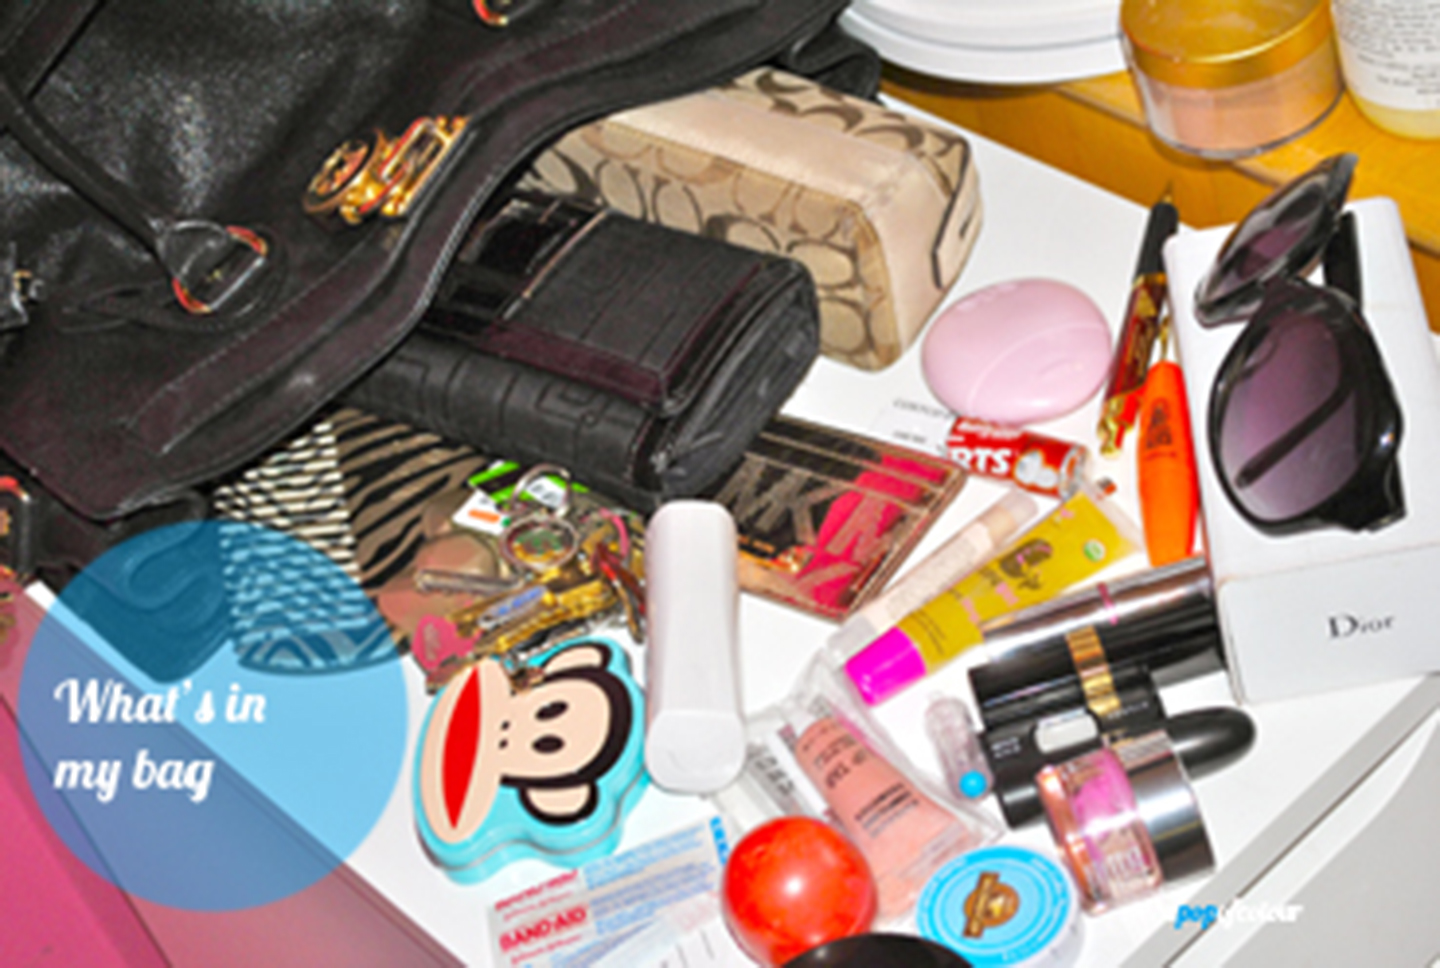
Some of my favourite YouTube videos to watch are what’s in my bag vids. I don’t know why they are so interesting, but I have always had a fascination with the things that people carry around. I did a what’s in my bag post about a year ago but I thought I would do a work bag version because apparently I carry way more stuff than just what’s in my regular handbag.
My work bag at the moment is the Michael Kors Hamilton large tote in black with gold hardware. I did do a review on that bag when I got it, but to sum it up, it’s a roomy bag, perfect for work, travel, you name it. It’s a little too big to carry on the weekends, but I love using it Monday to Friday 9-4, or as a carry-on when I travel (my MacBook Pro or iPad fit perfectly in it). It features two drop handles as well as a shoulder strap for when you want to be hands free.

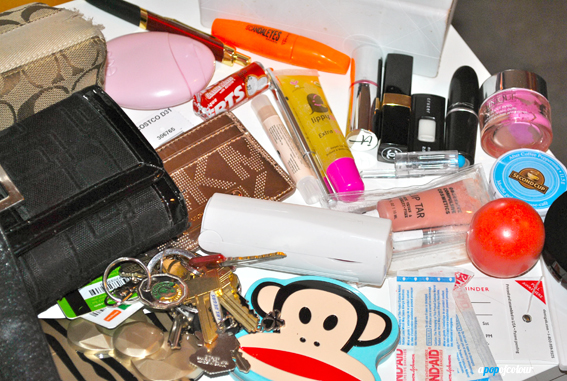
Here’s what I keep in it:
- Wallet – this is the same wallet I have been using for a few years now. I got it at Sears a while ago for like ten bucks and love it because it can hold a lot of stuff (I have a lot of rewards cards).
- iPhone 4
- Certs and Second Cup breath mints
- Hello Kitty by Sephora comb
- Couple bandaids and floss
- Paul Frank container with paper and a pencil (I got this in a Happy Meal at McDonald’s)
- My keys – includes rewards cards from Sobey’s and Sally’s Beauty Supply
- Michael Kors card case – I keep my business cards in there
- Clinique mirror
- Coach cosmetics pouch – has Angel perfume, ELF concealer/highlight, a pen, Rosebud Salve, a highlighter, random staples, a Sephora mirror, and Aveeno hand cream in it.
- EOS Hand Balm
- A pen
- Christian Dior Glossy 1 sunglasses
- A lint roller from Petco
- A pen cap (not sure where the actual pen went though)
- OCC Lip Tar in Hush
- Chanel Coco Rouge Shine in Liberte
- IT Cosmetics Vitality Lip Balm in Je Nais Sai Quoi
- EOS lip balm
- Joe Fresh matte lipstick in Bubblegum in a Clinique All About Eyes jar (the lipstick broke so I put it in there)
- A USB flash drive
- A USB drive from Rimmel London (the one shaped like a mascara tube)
- Lippy Girl lip gloss
- Lippy Girl Sha-Zam lip balm
- MAC lipstick (I can’t remember which one this is)

And that’s all! When I look in my bag it doesn’t seem like a lot of stuff, but when I was writing it out, wow, I have a ton in there.
What do you carry in your work bag?
Like what you read? Check out these related posts:

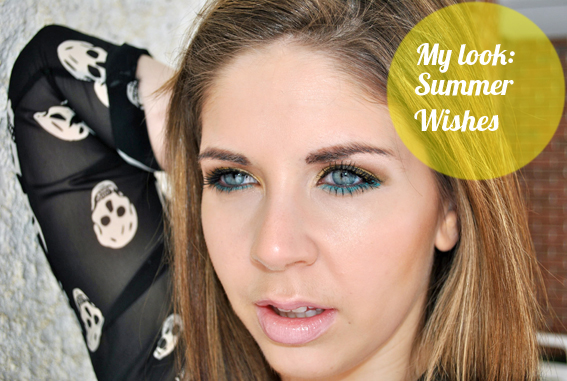
Well, if Wiarton Willie, Canada’s leading groundhog, was right, we will be seeing an early spring. And thank goodness because I am so over winter right now.
I have been feeling like wearing bright blues and yellows — colours I usually sport during the warmer months. So in anticipation of spring and summer ahead, I thought I would just bite the bullet and wear these bright shades to warm up my day (plus the weather has been kind of nice, well, better than -40 degrees C).
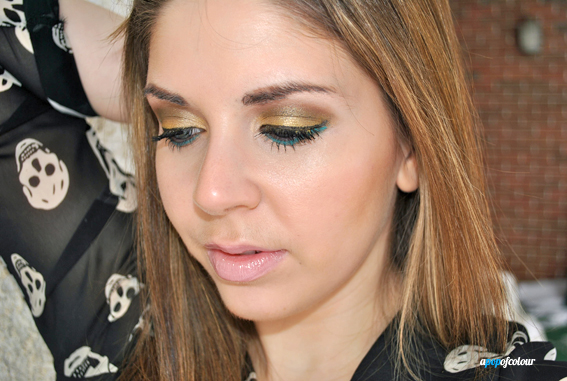
Here’s how to create the look.

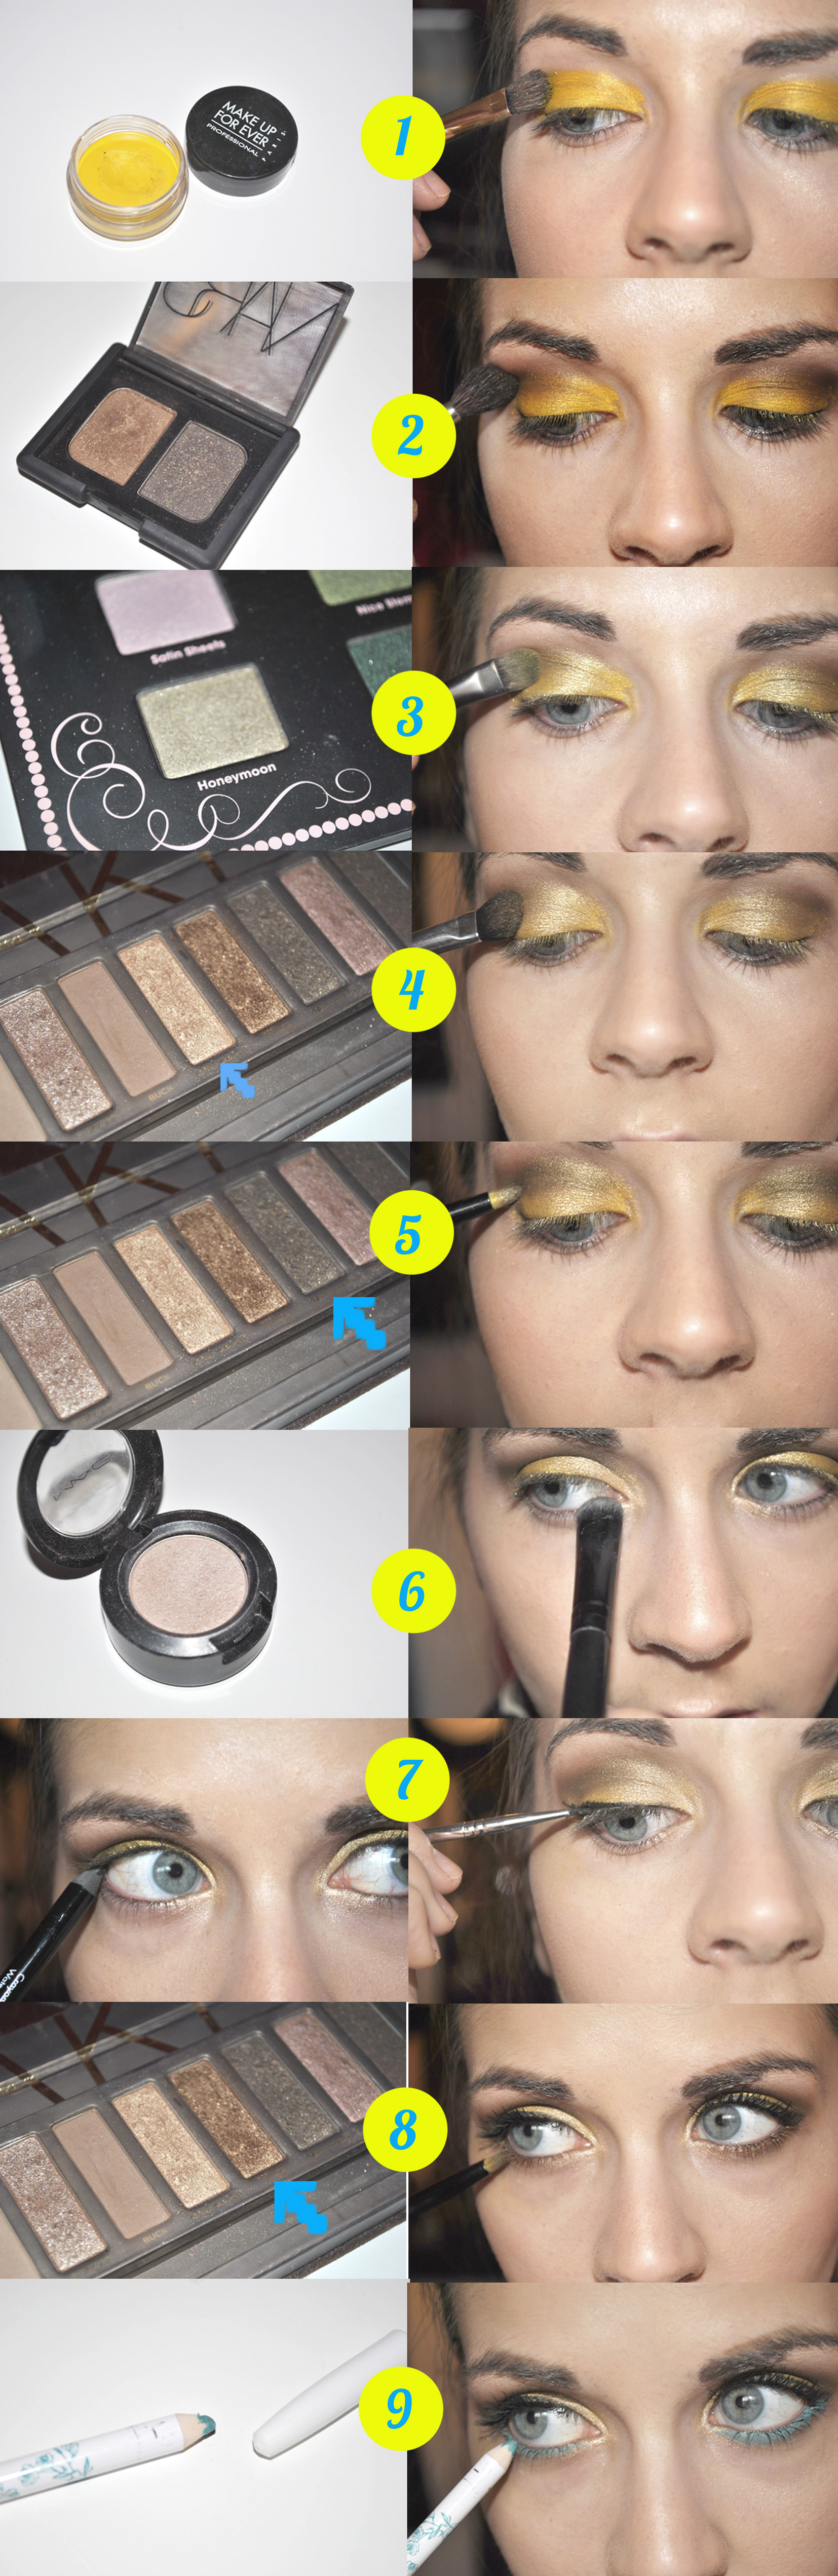
1. With a yellow base, such as Make Up For Ever Aqua Cream in 24 Yellow, apply this all over your lid area.
2. With a brown eyeshadow and a fluffy brush, apply this in the crease area. I used the two colours from the NARS Cordura eyeshadow palette, applied with a Inglot 6SS brush.
3. Moving onto the lid, apply a moss green colour with a flat eyeshadow brush. I used Too Faced Honeymoon from the Sweet Indulgences palette.
4. With a gold colour, apply this all over your lids with a fluffy crease brush. I used Half Baked from the Urban Decay Naked palette.
5. Going back to your crease, apply a dark brown eyeshadow with a pencil brush in the crease. I used Darkhorse from the Urban Decay Naked palette. With a fluffy crease brush, blend it all together.
6. To highlight, apply a champagne colour in the inner corner of your eyes. I used MAC Naked Lunch.
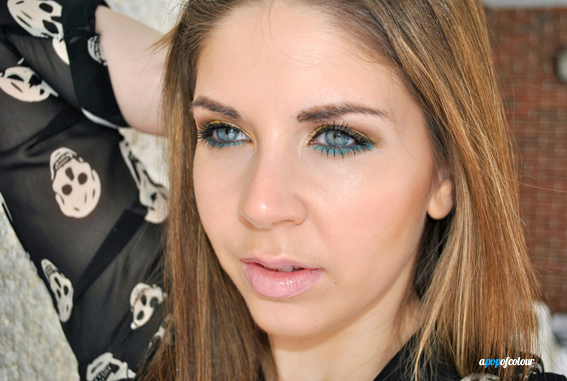
7. For eyeliner, first line your tightline with a black pencil liner, then line your upper lash line with a gel liner and slightly wing it out. I used Make Up For Ever Aqua Eyes in black and then Buxom Lash Liner in Sequins. After, apply mascara, and if you want, falsies. I didn’t use false lashes, just mascara. I applied Lancome Hypnose Star with Rimmel London Volume Flash ScandalEyes mascara over top to amp up the volume.
8. Moving onto the lower lash line, with a pencil brush, apply a primer first, then a shimmery golden-brown. I used Smog from the Urban Decay Naked palette.
9. This part is optional, but if you want to spice up the look and make it more fun, apply a blue liner over smog. I used Lancome Kohl Liner in Jade Crush. To finish up the look, apply mascara to your lower lashes.


And that’s it! I hope this look brings some warmth to your life. I’ll be rocking it again in a couple months.
Like what you read? Check out these related posts:

 I chose to try Stickers and Stones first because that one caught my eye first. I paired it with Essie’s No Place Like Chrome to bring out the silver detail (the purple/grey colour in the sticker really reminds me Essie’s Chinchilly by the way).