
I am in desperate need of a microblade fill.
I got my brows microbladed late last year and it’s seriously helped me up my beauty game. I was left with perfectly symmetrical brows and it gave me a good guideline of where exactly I need to fill them to make them look perfect everyday.
The last time I got a fill was in December and I’m actually scheduled to go again next week, but until then I have been relying on an assortment of brow products. Now, I won’t actually fill them in everyday but if I’m leaving the house and actually care about what I look like then you’ll usually see me sporting some sort of brow pencil (I’ve been loving the BrowLuxe one I reviewed a few months ago). I recently got a new brow product, and having tried similar versions from different brands, I couldn’t wait to put it to the test.

The Rimmel London Wonder’Full Brow 24HR Waterproof Brow Mascara is a brow mascara that works the same way as Glossier Boy Brow and Benefit’s Gimme Brow. It features a micro spoolie tip to dispense product, giving the illusion of thicker, fuller brows. It also works as a setting gel for brows so they appear groomed and set.
The product, available in three shades (blonde, medium brown, and dark brown), is infused with a brow boost complex which includes biotin and collagen, as well as four oils including argan, maracuja, marula, and camellia oil. In addition, it also dispenses flower-shaped fibres onto the brows for a natural-looking appearance.
I received all three shades and couldn’t wait to put this to the test. I’ve always had pretty full brows to begin with, so often I’m if I’m using a product like this, it would be to just lightly fill in the brows if I’m heading to the pool or beach or if I want a very minimal makeup look (I love pairing this with a CC cream, a cream blush, and a hint of mascara for an effortless vibe). I’ll be honest, I have both the Glossier and Benefit versions so I had high hopes for this product, but I found it didn’t really do much for me. It’s also very hard to remove since it has a 24-hour wear which is waterproof, smudge proof, and fade proof (which is great for the summer IMO).


Overall, if you are looking for a more affordable version of Gimme Brow or Boy Brow, I would take a look into this product because they all work the same way, that is it dispenses products and fibres to give you a fuller-looking brow. I also want to note that I do enjoy using this product as just a gel. For instance, I would fill in my brows and then use this to set it. Just be aware that it’s a little tough to remove.
Do you use brow fibres to fill in your eyebrows?
Products provided by PR. All opinions are my own.
Like this post? Check out these related articles:
 I can’t believe I’m writing this, but it’s my last day here in New York City.
I’ve been here for a month already and as the saying goes, it definitely went by in a New York Minute. As mentioned in my NY skincare post, I’ll be coming back and forth here over the next year, so just like how July flew by, I’m sure August will just zoom along as well and before I know it, it’ll be September and I’ll be back to living my best Upper East Side life.
Anyways, the one thing I learned while “living” here is that it’s much more different than just visiting. Stark reality number one: It’s very expensive to be here. Sure, I would have loved to eat out at restaurants every meal and every day, but when an entrée costs a minimum of $15 USD (and that’s pretty reasonable actually), those costs add up quickly. So then there’s grocery shopping, which is also very expensive as everything is priced up more than it is in other American cities (I saw an single avocado go for $4.99 at a grocery store near me… I’m not even kidding). So, being the thrifty girl I am (I love to save a buck), I thought I would write a post on how to enjoy New York, without spending an arm and a leg to do so (plus some other fun tips I acquired while being here).


Take the subway or walk
Rule number one is always take the Metro. At only $2.75 a ride it’s a much more affordable option than taking an Uber or a cab. Best part is, the subway system can get you pretty much anywhere in a shorter amount of time than a car would (the traffic here is insane). So save those dollars for that over-priced mimosa and instead invest in a Metro card. Plus, you’ll be able to walk off all that New York pizza you’ve been consuming.
Another great option to is walk. I can’t even tell you how many steps I did in this past month alone. My favourite app to use for navigation is Citymapper and it tells you how long each method of transportation would take. For example, if it was a half-hour walk, I would usually just walk it since 30 minutes really doesn’t seem that far in New York. Here’s the thing about the city though, there are so many things to look at, that that half hour walk may feel like an eternity back home in Winnipeg, but it’ll go by in a breeze here in New York (plus, it saves me the need to go to the gym here as well).
Also, I highly recommend you bring a pair of comfortable shoes. We all have that image of wanting to be Carrie Bradshaw and walking around in a pair of stilettos, but I guarantee you, after five minutes you’ll be regretting that choice immediately.

SoulCycle
Speaking of the gym, the only physical activity I took part in (aside from walking everywhere), was SoulCycle. A SoulCycle class in the city will set you back $37, plus the cost of shoes $3, so for $40 it is definitely an investment. I take spin classes back home in Winnipeg at some local studios, but none of them compare to SoulCycle. It might be the music, the enthusiasm of the instructors, the motivation, the chance to ride beside someone famous, or the thrill of just being there, but once you leave that studio a sweaty mess, I guarantee you, it will be worth it. Plus, it will make you feel better after drinking all those Aperol Spritz’s and New York pizza, because let’s be honest, who goes to New York and doesn’t eat to their heart’s content?
I recommend checking out the new Hudson Yards location since it’s brand-spanking new in one of the coolest new locations in the city. This studio has super cool lighting that syncs with the music, so it’s like a workout, a dance party, and a show all in one. Once you’re done your 45-minute class, hit the showers and use their Le Labo products and then take your time getting ready. After that, hit The Vessel and one of the restaurants at the Shops of Hudson Yards.
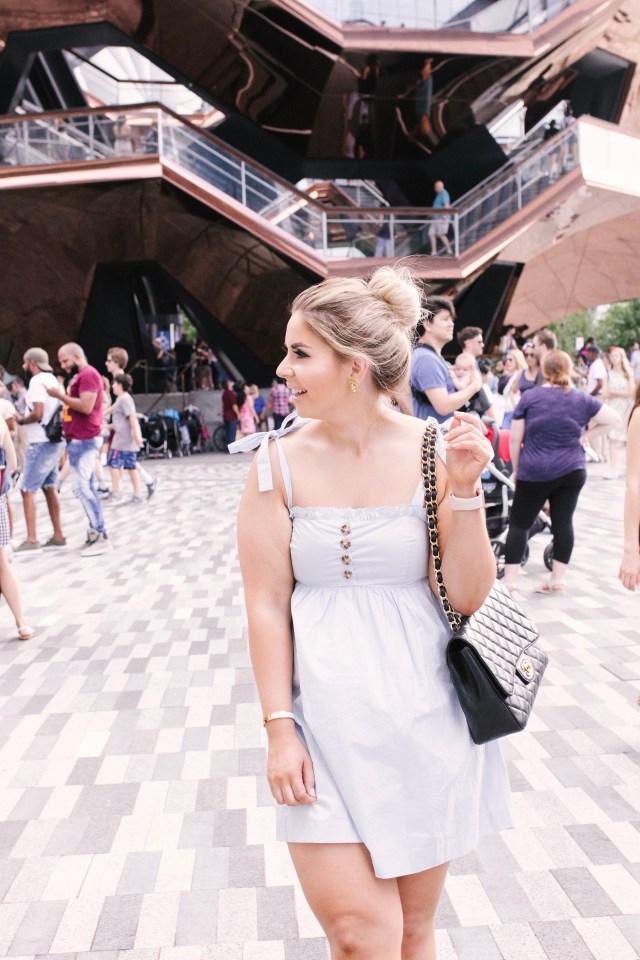
Hudson Yards
Officially opened in March 2019, you may have seen The Vessel all over your Instagram feeds. This shawarma-shaped installation that you can climb is one of the hottest tickets in the city (and it’s free!). Here’s the thing though, they open up tickets about two weeks in advance and unless you’re lucky, it will probably show it as sold out (although it’s free, you get a time slot and you can go in and climb it anytime within that slot). They also offer passes for $10 that guarantees you entry anytime of the day on the day of your choice.
Skip all that and just show up on site and go up to one of the kiosks which will give you a time that day (although it may be two or three hours ahead of when you’re there). If you really want to climb it, get tickets that way and then grab at bite and shop at the Shops of Hudson Yards (they have a Shake Shack in there, as well as Fuku, a fast-food chicken joint by the same guy who does Momofuku *highly recommend*), or walk the High Line, which is accessible right behind it and explore the Meatpacking District and Chelsea Market and Pier. Trust me, there’s more than enough things to do to kill a few hours.

Eating out
There are soooooo many places to eat in New York. In fact, any sort of food you could ever possibly want, you can have here. The options are seriously endless, but if you’re like me and want to save a buck or two, I recommend checking them out during happy hour. The drinks are just as expensive as the food, so hit up that local café or bar during their happy hour times for discounted meal and drink items.
If grocery shopping is more your thing, the best prices I have found was at Trader Joes. We took the subway every Sunday to the Trader Joe’s in Union Square (which also has the Trader Joes Wine Shop next door). Be warned though, unless you’re going right in the morning, expect the line up to pay to be at the door you walk in (although it does go quickly). It’s not the biggest grocery store, so although you may be tempted to just browse, be smart and make a list ahead of time because it’s very crowded in there.
Shopping
Did you really go to New York if you didn’t buy anything. Just like the food, you can get anything and everything here in New York.
I’m very much a shopper and over the years my mindset has been to invest in more quality pieces as opposed to fast-fashion items. It’s very tempting to walk down Madison Avenue and Fifth Avenue and want to go into the stores and buy something really pretty which will put me back hundreds of dollars.
If you’re a Canadian, it’s more wise to purchase that designer item back home since the conversion for us sucks right now. Everything I bought this trip was on sale, and let me tell you, there is some great sales to be had.
Okay, so I might have bought a few dresses at Urban Outfitters, but here’s the thing… the selection at my local UO in Winnipeg is awful and the selection here is amazing since they have pretty much every item on their website. Yes, I could have ordered online, but again, some of my sizes were sold out.
My mentality when shopping here was “can I get this back home?” or “is this is an amazing deal?”. If I couldn’t get it in Canada, I got it.
Another amazing tip is to shop a sample sale. My go-to sample sale place is 260 Sample Sale, which is located at 260 Fifth Avenue. They rotate out the designers weekly, so keep an eye on their website and Instagram to see which designers they have the week you’re in town. For example, I got a La Perla corset for $66 USD, regular $1,300. Crazy, right?! I also got a pair of APL sneakers for $75, regular $250. If you’re going to do shopping, I highly recommend finding a sample sale since the deals are insane. Pro tip, the last few days of the sale they usually will discount the items more, but you don’t get the best selection/sizes.

Go to Central Park
Okay, so I’ll be honest, coming to New York I was mostly going to Central Park for Ziggy, but after having walked in the park many times, you need to add this to your list if you’re coming here.
Central Park is massive and every time I go to it I discover something new. There’s always tons of people around, the energy is high, there’s music, dancing, people having picnics, people on row boats, places to eat, you name it. Seriously, every time I’m in there my energy level rises and it’s so nice to be surrounded by trees and nature in the middle of a concrete jungle.
I don’t recommend paying for the carriage rides, but you could download the Citi Bike app and rent a bike to discover the park if you don’t want to walk it. These are available everywhere in NYC and cost $3 for a half hour ride. I didn’t personally use these when I was here (although I was tempted), but there’s also lots of bike lines on the main streets if you wish to use them to get to your destination above ground.

Go see a show
Just like the food and shopping options, if entertainment is your thing, you can have your pick of just about anything here.
I’ve done Broadway on previous trips here to the city, but since tickets can be pretty expensive, take a look at entering their ticket lotteries. Most shows have online lotteries where you can enter to win discount tickets for amazing seats. Although I didn’t win any (I entered for Hamilton and Mean Girls every day), it doesn’t hurt to enter anyways. Check out Broadway for Broke People for the list of shows with lotteries you can enter.
If you’re not really fussy on which show you want to see, head to one of the TKTS booths to get some discounted tickets for the night of. Last year I saw Waitress for I think it was $80 and my seats were on the main level.
If you are looking for something more budget conscious, then get tickets to a taping of a talk show. I went to Live with Kelly and Ryan while I was here and it was such a cool experience seeing how they do the taping and seeing how different it all looks in real life. Best of all, taping tickets are free! You just have to plan ahead if you don’t want to wait in the standby line. Download the 1iota app (or check out their site) to see the tapings available for the dates you’re visiting.


It’s all about the views
Okay, so this one will set you back in both time and money, but I recommend heading to a rooftop bar to check out the views of the city.
Most of them are located in hotels, so there may be a bit of a wait to get up, but once you’re up there the views are seriously amazing. One thing I want to note though is that you’re also paying for that view. Drinks will typically set you back $19 for a cocktail, so maybe pregame ahead of time. For the best views, I recommend going to Williamsburg in Brooklyn and going to their hotel rooftop bars since it gives you a panoramic shot of Manhattan.
Jimmy at The James Hotel in SoHo is also a great choice to check out, but for the most impressive views, definitely head to Brooklyn.
I can really go on and on about my month in New York, but since I’ll be spending lots more time here, I’ll leave it at this. There is seriously so much to see and do here (and eat!) that I highly recommend planning a trip and then making a solid itinerary.
Also, if you’ve been to NYC and have some tips for me, I would love to hear them! Please leave me a message in the comments below on what are some of your must haves to do in the city.
Have you been to New York?
Like this post? Check out these related ones:

Everyone knows the feeling.
You put on your favourite lipstick but then a few hours later it’s faded. Brands are definitely coming out with more lip products lately that have a lot more staying power than their older counterparts. If you’re looking for something that will truly stay on and fade out nicely then you’re going to want to take a look at a lip stain.
Avon just came out with a new lip stain collection, which consists of six different shades and come housed in a dual-ended applicator. One end is used to line the lips and then the other is used to draw them in. This lip stain packs some serious staying power and will promise all-day wear with no smudging, feathering or budging. The colour is semi-permanent and feels weightless on the lips.

The brand sent me three of the 2-in-1 Lip Tattoo Line & Fill Duos to try out and to be honest, I’m not the biggest fan when it comes to the consistency of stains in general. I don’t find them to be that flattering on me, but I was more than happy to give them a try. I got the shades Rebel Raspberry, Renegade Ruby, and Gnarly Nude, and I found the red-toned ones to be very true to colour, however, Gnarly Nude didn’t give me the nude vibe I usually look for and instead was more of a coral on me.
As for the applicators, I found them to be reminiscent of markers and didn’t really think there was a need for it to be dual-ended. I think the one end would have been just fine since it’s rather flat and rectangular, meaning that you can use it to trace your lips anyways.


As for staying power, these definitely do stay on and if you’re looking to sport something for a short amount of time, I would skip these since they really do last on the lips. I also want to note that they are infused with sunflower seed oil to help hydrate the lips, so they are a comfortable wear as well.
These retail for C$11.99, regular C$15. Like I said, I’m not a fan of lip stains in general but if you like them then you can’t go wrong with these. I would stick to the darker and more red/pink shades over the lighter ones though since you’ll get the most bang for your buck that way.

Do you like lip stains?
Please note, products provided by PR. All opinions are my own.
Like what you read? Check out these related posts:
