Glitter. We all love looking at it, but when it comes to actually wearing it, it can be messy. God forbid you apply your foundation first, then you’re left with glitter particles all over your face and they are all but impossible to wipe off.
I got one of the NYX Face and Body Glitters in Gunmetal at the London Drugs Fall Beauty Preview this past June in Vancouver and I’ve been itching to try it out. Since it’s loose glitter though, I wanted to think of a way to wear it without it being too messy. Then I got the NYX Glitter Primer, which minimized glitter fallout and keeps it in place. Basically this product (Too Faced makes one as well) is a necessity if you love loose glitter.
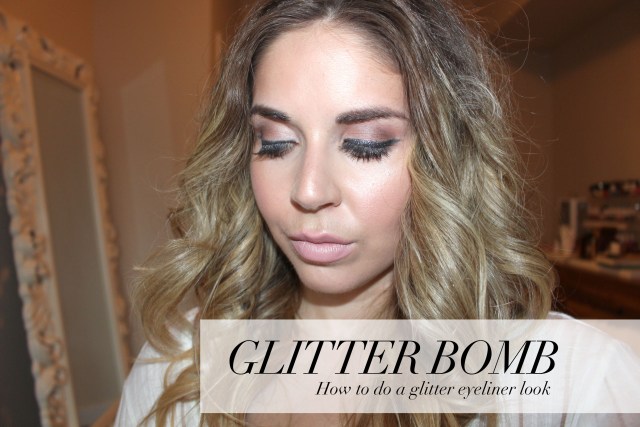
It was my best friend’s birthday party this past Friday so I thought it was as good a time as any to bust out the grey glitter and come up with a look that was oh so flashy. Instead of coating my whole lid in the stuff though I wanted to keep it more low key since we were just going for dinner and drinks, as opposed to the club where that look would be more appropriate. I opted for a light eye look with a winged liner and then I coated the black liner in glitter for a sparkly effect. I absolutely loved how this came out and best of all, there was virtually no mess and no fall out. Total score.

 1. Since we’re working with glitter, do the eyes first. Fill in your brows, then lay down an eyeshadow primer, I used Kat Von D Lock-It Color Correcting Eyeshadow Primer. Starting with the crease, lightly apply an orange eyeshadow (like this orange Make Up For Ever Artist Shadow),
2. With a shimmery champagne pink, like the one from the CoverGirl TruNaked eyeshadow palette in Roses, apply that to your lid area.
3. With the matte brown and a crease brush, apply that lightly to your crease to darken it up
4. For the liner, first I applied a black liquid liner, winging it out. I used Kat Von D Tattoo Liner in Trooper.
5. With the NYX Glitter Primer and an angled eyeshadow brush, apply this gently over the black eyeliner. Then, with the glitter (NYX Face and Body Glitter in Gunmetal), apply that over the primer to add some shine. After, apply some mascara and some falsies for a dramatic effect. I have eyelash extensions, so I skipped this step.
6. To finish up the eyes, I applied the same matte brown along my lower lash line and then some mascara on my lower lashes.

Once the eyes are done, now you can move onto the face. I used Make Up For Ever Ultra HD Foundation with Kat Von D Lock-It Creme Concealer Creme. I went over the face with Hourglass Ambient Lighting Powder in Dim Light to set everything. The bronzer for the contour was from the Anastasia Beverly Hills Contour Kit and the blush was Marc Jacobs Air Blush in Night Fever and Hot Stuff. The highlight is from the Tarte Rainforest of the Sea Highlight palette and the lip colour is Rimmel London Lasting Finish by Kate Moss in 41.
Although there are many eyeliners out there that have built-in glitter (Make Up For Ever’s Aqua XL Eyeliner line has one), when you layer a little sparkle overtop of a matte liner it really does go the extra mile. Also, if you’re going to invest in some loose glitter you must pick up a primer as well. The NYX Glitter Primer is only C$8, so it’s well worth it to have in your collection.
Have you tried a glitter liner?
Like what you read? Check out these related posts:

 If you love Marc Jacobs’ Fineliner Ultra-Skinny Gel Eye Crayons, then you’ll love what they just released this past summer.
The super-skinny gel pencil, which was originally released in just black and white, got a few more colours added to the gang a couple of months ago.
If you’ve never used Fineliner before, the skinny eyeliner is a super pigmented gel product that glides on your lids and stays there. The two-millimetre tip (said to be unbreakable) applies colour smoothly and sets in place for all-day wear. Since it’s so tiny, you can really get a precise line with a shock of colour.

I absolutely love the black one (Blacquer), which I received last year when they were first introduced. I usually reach for felt-tip liquid liners, so I was surprised about how much I really love this product. It has a twist up to distribute the product and it really does glide on smoothly, giving you amazing colour payoff.
The new colours in the line consist of a golden brown, (TRUFFLE)D; a berry violet, BLACQUER(BERRY); a deep evergreen, CO(VERT); a cobalt blue, CODE BLUE; and a deep smoky grey, CINDER(ELLA). What you see is what you get with these, as they go on as pigmented as they look in the package.
My favourites are the brown and purple, however, the blue and green are so beautiful and eye-catching that you’ll be itching for a special occasion to wear them. These also work great in your waterline as they set quite fast.


Although the wear is amazing on them, if you have oily eyelids you may want to put a shadow down first as I did find some of them smudged onto my lids throughout the day. Other than that though they do keep still, so much so that you may find it difficult to remove at the end of the day.
The Marc Jacobs Fineliner pencils retail for C$30 each at Sephora. They are pricey for an eyeliner, but keep in mind they are technically a gel, which usually retails for a bit more. If you’re looking for a high-quality eyeliner, this is it.
Have you tried Marc Jacobs Fineliner yet? What’s your favourite shade?
Please note, this set was sent by PR. All opinions are my own.
Like what you read? Check out these related posts:
 One of my favourite features is my hair. If you were to look in my bathroom cabinet you’ll find more hair products than anyone will ever need. I just love trying out new products and keeping it in tip-top shape.
Unfortunately, years of colouring and using hot tools on an almost-daily basis has done some damage to my long locks. Usually by day two or three, my ends are going every which way and just feel so dry and damaged. Because of this, I’m always on the hunt for good shampoo and conditioners. My favourites for years have been Pureology and L’Oreal Professionel, which leave my hair soft and manageable and my colour looking amazing. With that being said, I have loads of different brands in my shower as I’m not afraid to try something new.

When I heard that celebrity hairstylist Jen Atkinson recently released a haircare line, I knew I had to try it. It’s sold exclusively at Sephora (my favourite store), and I figured if she’s besties with the Kardashians, then it must be good. The line, called Ouai (pronounced “way”), consists of 17 products, four formulations of shampoos and conditioners (volume, clean, smooth, and repairing), as well as hair masks and styling products.
I received the Smooth shampoo (C$35) and conditioner (C$32), which is great for pretty much all hair textures, and tames frizzy hair. Like I said, the mid to ends of my hair have been getting out of control so I was excited to test this out since I need some major smoothness in my hair. I had high hopes for this line and it didn’t disappoint; after one wash my hair was smooth and shiny, and stayed that way for many days after the fact. Even after multiple workouts and heat styling, my ends were as smooth as the day I washed them.

I also received the Ouai Treatment Mask (C$40), which is a box filled with eight individual packets of product. Again, this product is perfect for all hair types and repairs damaged hair and smooths split ends. At first I was disappointed in the packaging of this product since they are individual packs of product; I figured that you aren’t really getting your money’s worth. Here’s the thing though, I have so many masks that I often go overboard with when it comes to applying the product. I’ll slather like a quarter of the jar on my hair, thus using up the mask really fast. Because they are portioned out, one pack is all you need, and I can honestly tell you that your hair will feel amazing after applying this. You do have to let it set on your hair for five to 10 minutes, so maybe apply this on a day you’re shaving your legs in the shower as it a long time to stand there, but it’s worth it, your hair feels so smooth and hydrated once you dry it.
Lastly, since I love curling my hair, I was excited to try out the Wave Spray (C$32), which is good for straight, wavy, curled, or coiled hair. This spray is a weightless texturizing mist perfect for giving you those beachy, undone waves that are always so popular in summer. In addition, this product also adds volume and shine and is infused with rice protein to hold style without weighing your hair down and making it feel gross. I have straight hair, so after curling it I will spray my head with this stuff instead of hairspray and I find that it holds the curl really nicely, makes my hair smell great, and best of all, doesn’t make it gross like most hairsprays do. In addition to all the heat damage in my hair causing those frizzy ends, I also find hairspray does the same effect to my ends, so by using the Wave Spray instead, my locks look and feel healthy for days.

I couldn’t find Ouai in my local Sephora store, but if you’re in a bigger market, you can probably find it there. It’s also available online. It’s hard finding a good shampoo and conditioner that will make your hair look and feel amazing and if you’re in the market for something new, I would give this a try. Your hair will be saying no oaui! 😉
Have you tried out Ouai yet?
Please note, this product was sent by PR. All opinions are my own.
Like what you read? Check out these related posts:
