Mar
2014
Orchid fantasy: Sephora x Pantone Radiant Orchid collection + look

One collection I always look forward to is Sephora x Pantone Universe’s Color of the Year collection. I absolutely love colour and am always excited to see what shade Pantone will announce as the colour of the year. So basically, my favourite makeup store coupled with the biggest colour authority = a match made in heaven.
Sephora has put out Pantone collections since 2012 when Tangerine Tango was announced as the ’12 Color of the Year. They followed up with the emerald collection last year, and since Radiant Orchid is the 2014 Color of the Year, another collection has made its way into Sephora stores this month.
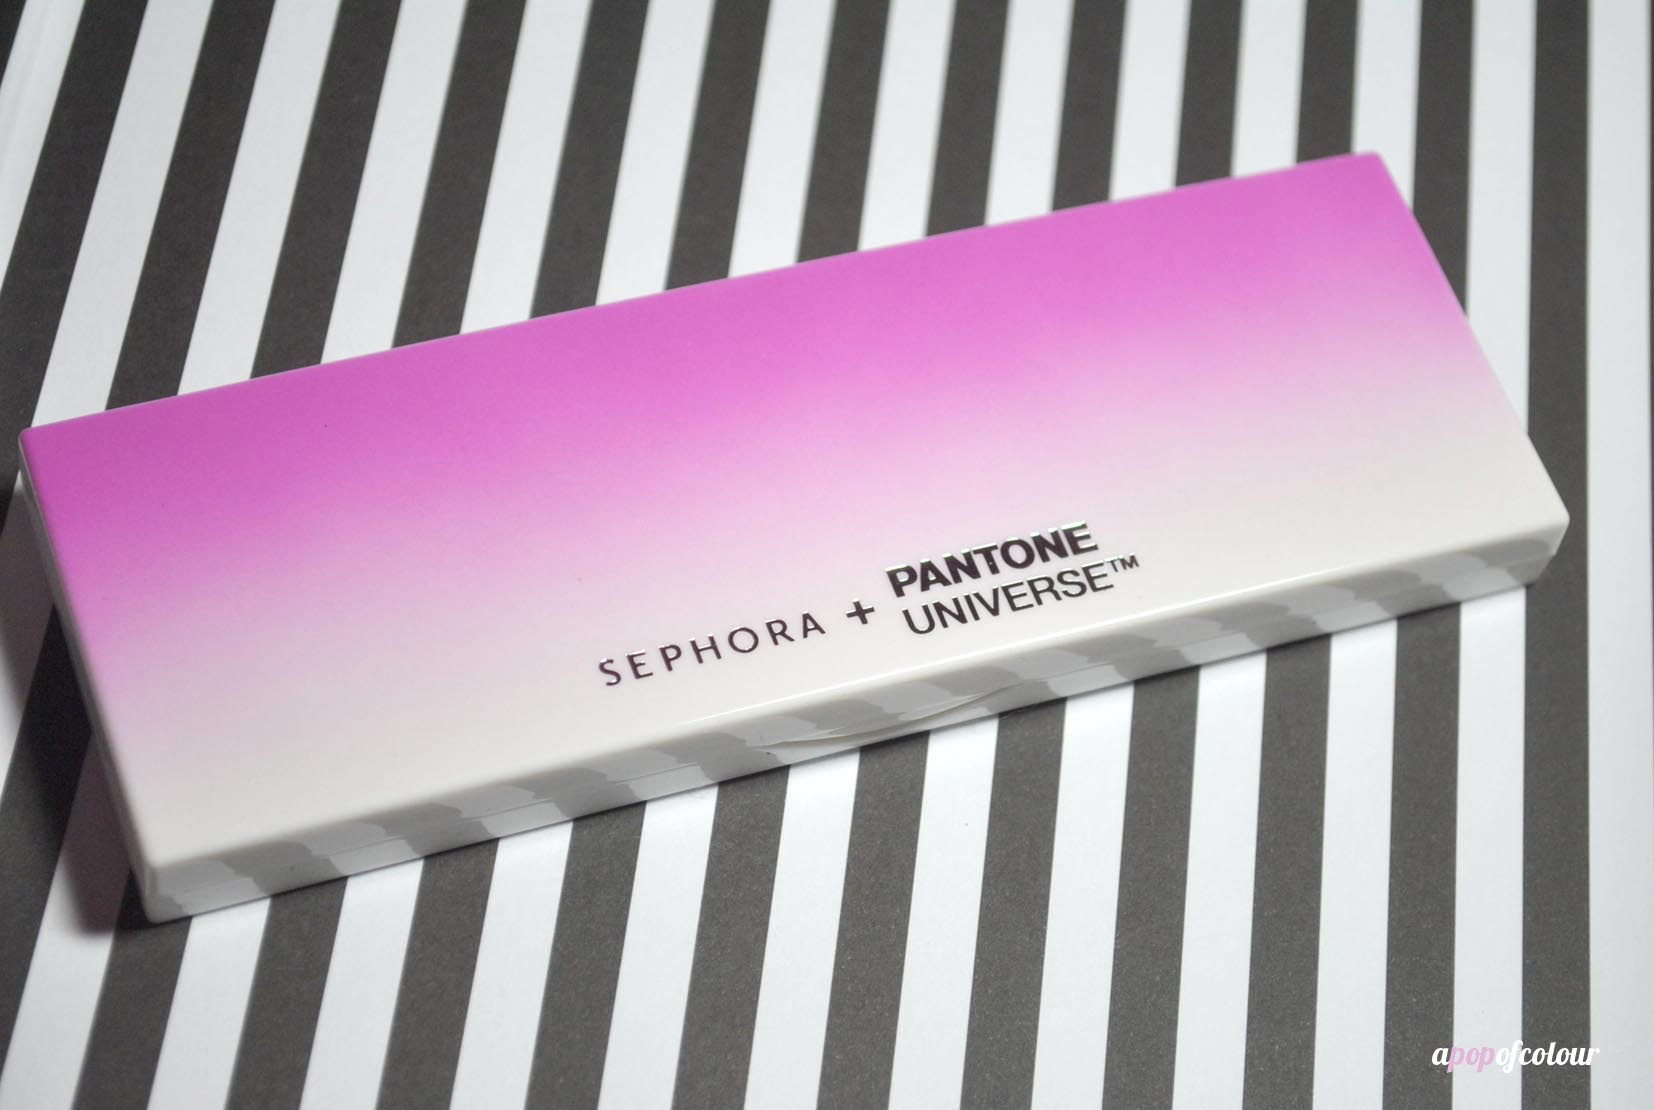
The Sephora + Pantone Universe 2014 Color of the Year Radiant Orchid Capsule Collection is filled with gorgeous fuchsia and complementary colours. They released everything from a nail polish set to a matte lipstick to a balm to a brush set and much more. I received the Rush Luster Cheek Sweep (C$21), the Venus Lure Lip Balm (C$20), and the Color Gaze Brush Set (C$82) before it launched in stores to try out.
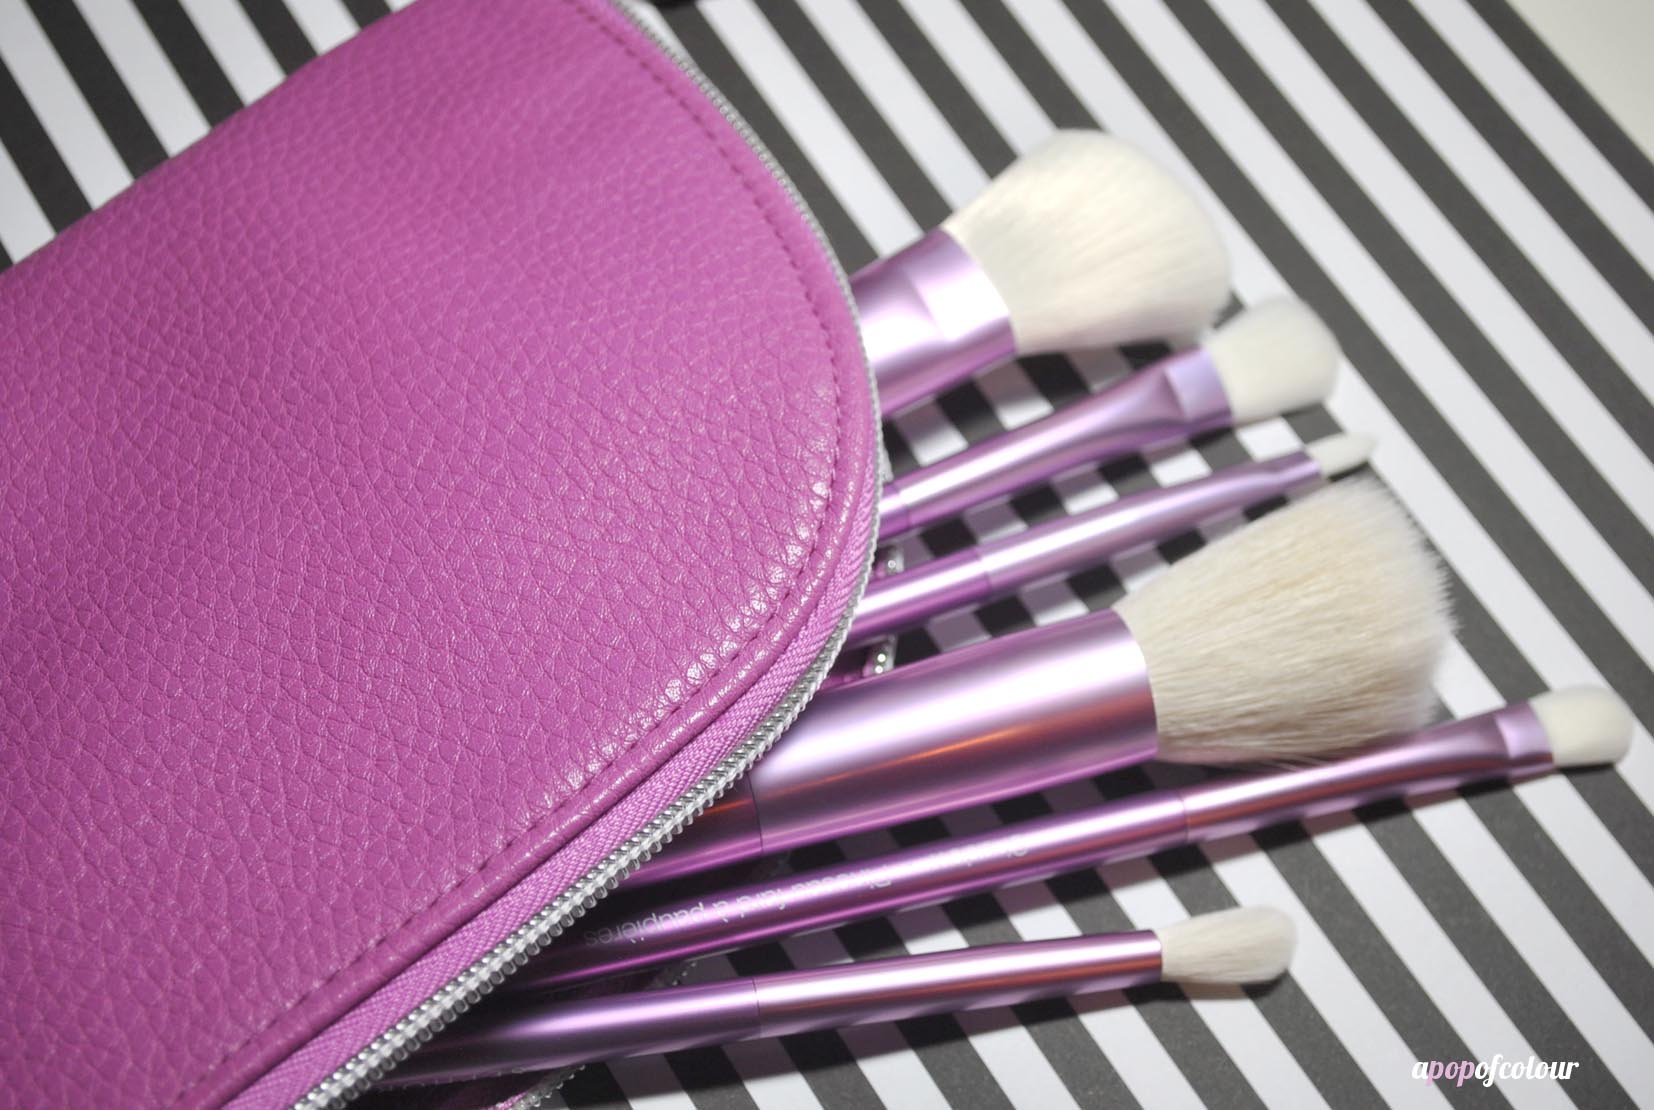
Color Gaze Brush Set.
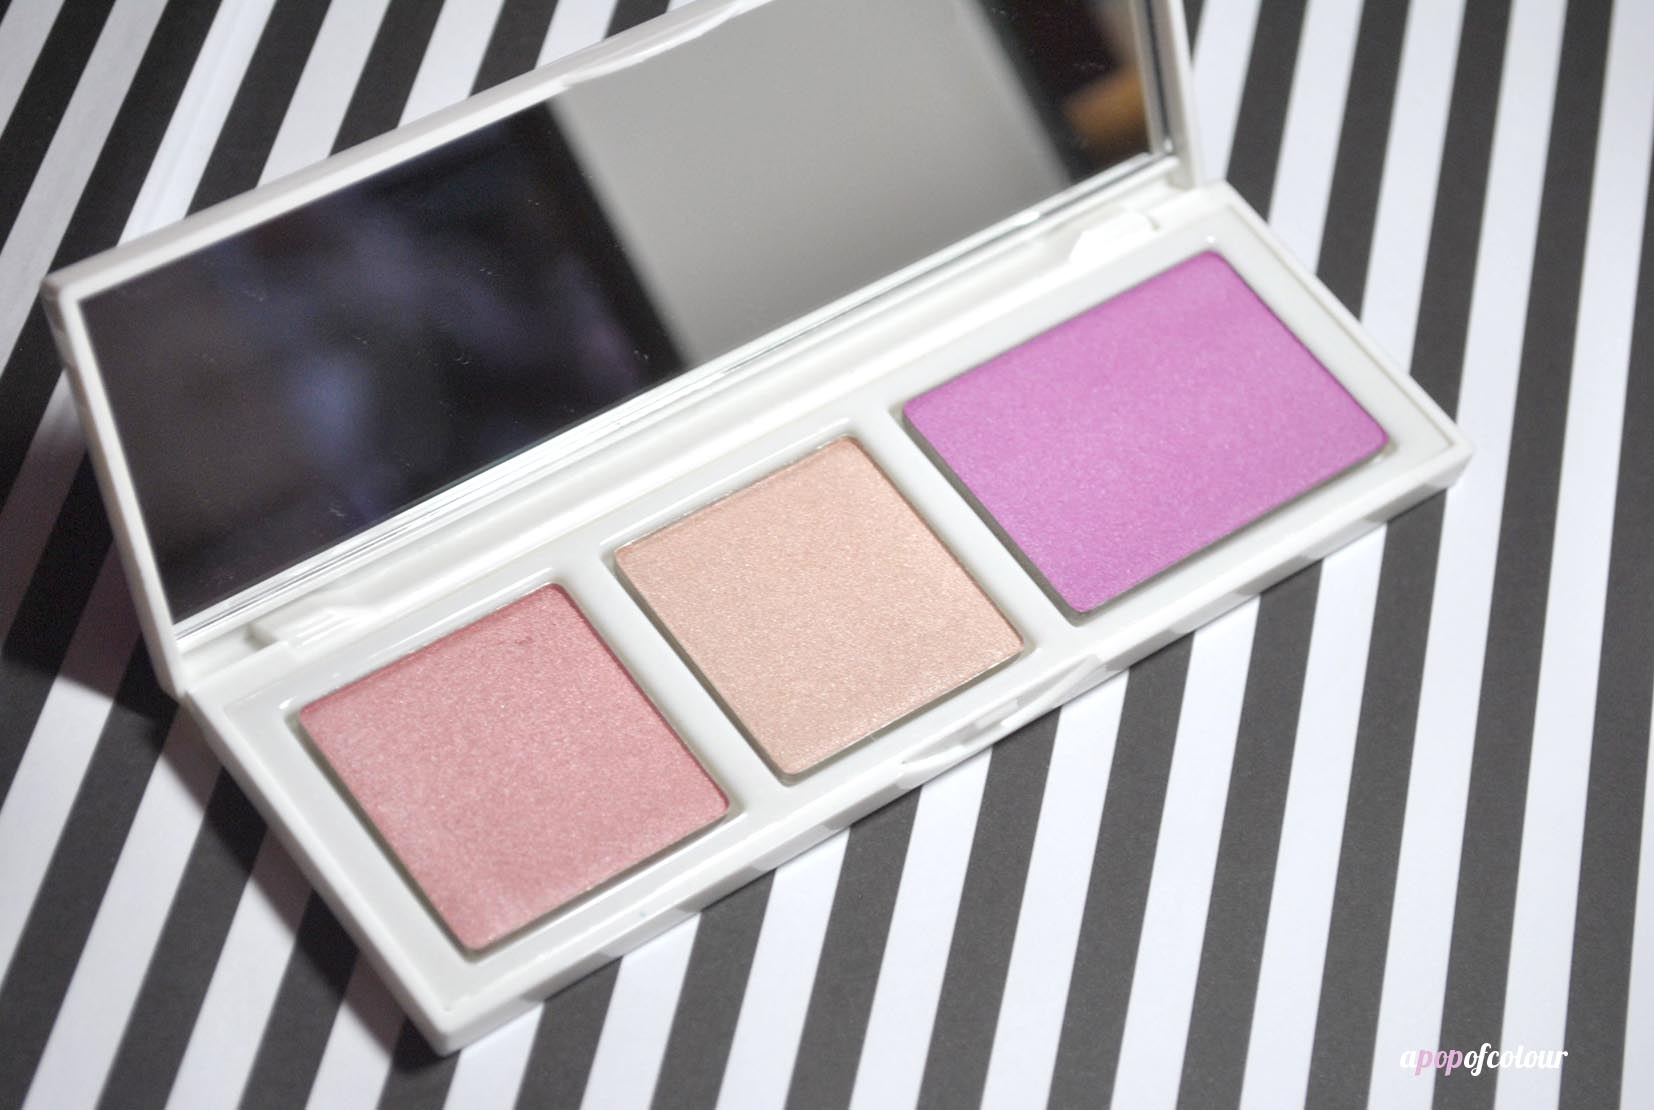
Rush Lustre Cheek Sweep
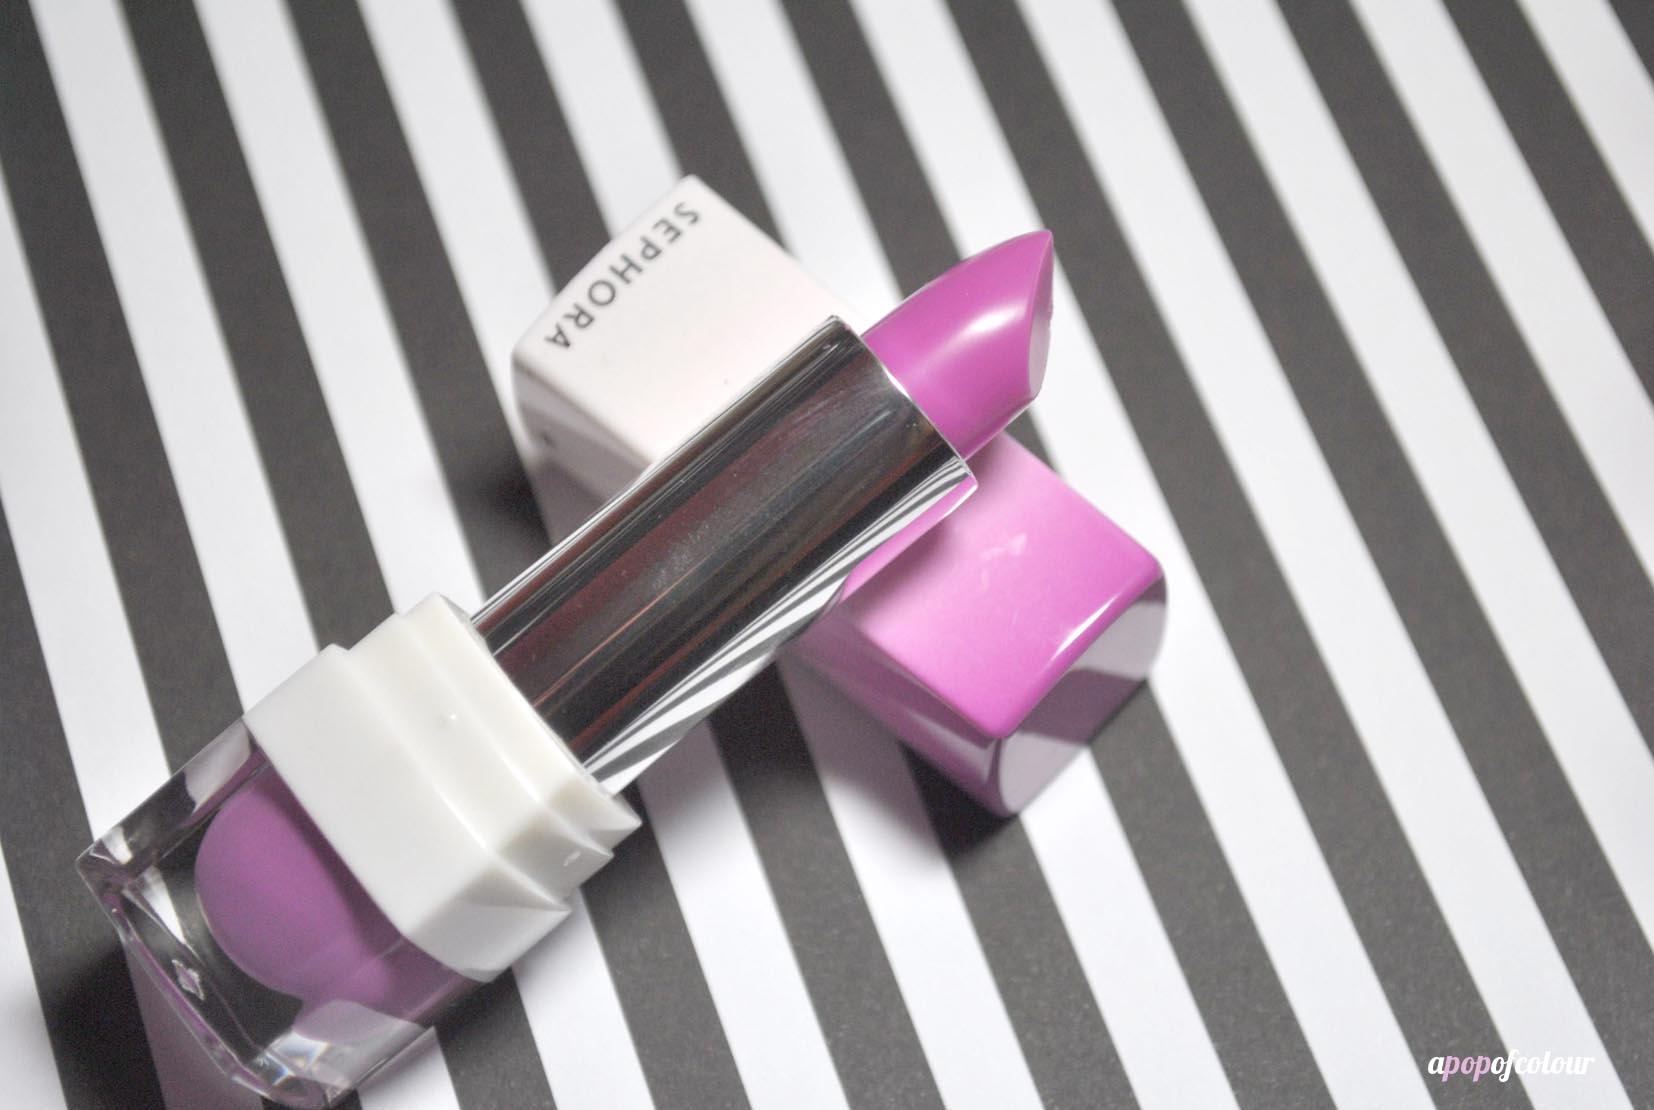
Venus Lure Lip Balm.
The Rush Luster Cheek Sweep is a compact filled with the radiant orchid blush plus two complementary highlights in champagne and pink. The highlights can also double up as eyeshadows.
The Venus Lure Lip Balm is a soft-hued balm that combines nourishing orchid essence Hyaluronic Acid and collagen for a soft, smoothing effect with shine and tone. This goes on quite sheer but does give you that plumping effect.
The Colour Gaze Brush Set contains six high-quality brushes in a pebbled vegan leather standing case. The set includes an angled blush brush, stippling brush, all-over shadow brush, crease brush, shadow brush, and lip brush. All brushes have white synthetic hair and radiant orchid-coloured bristles.
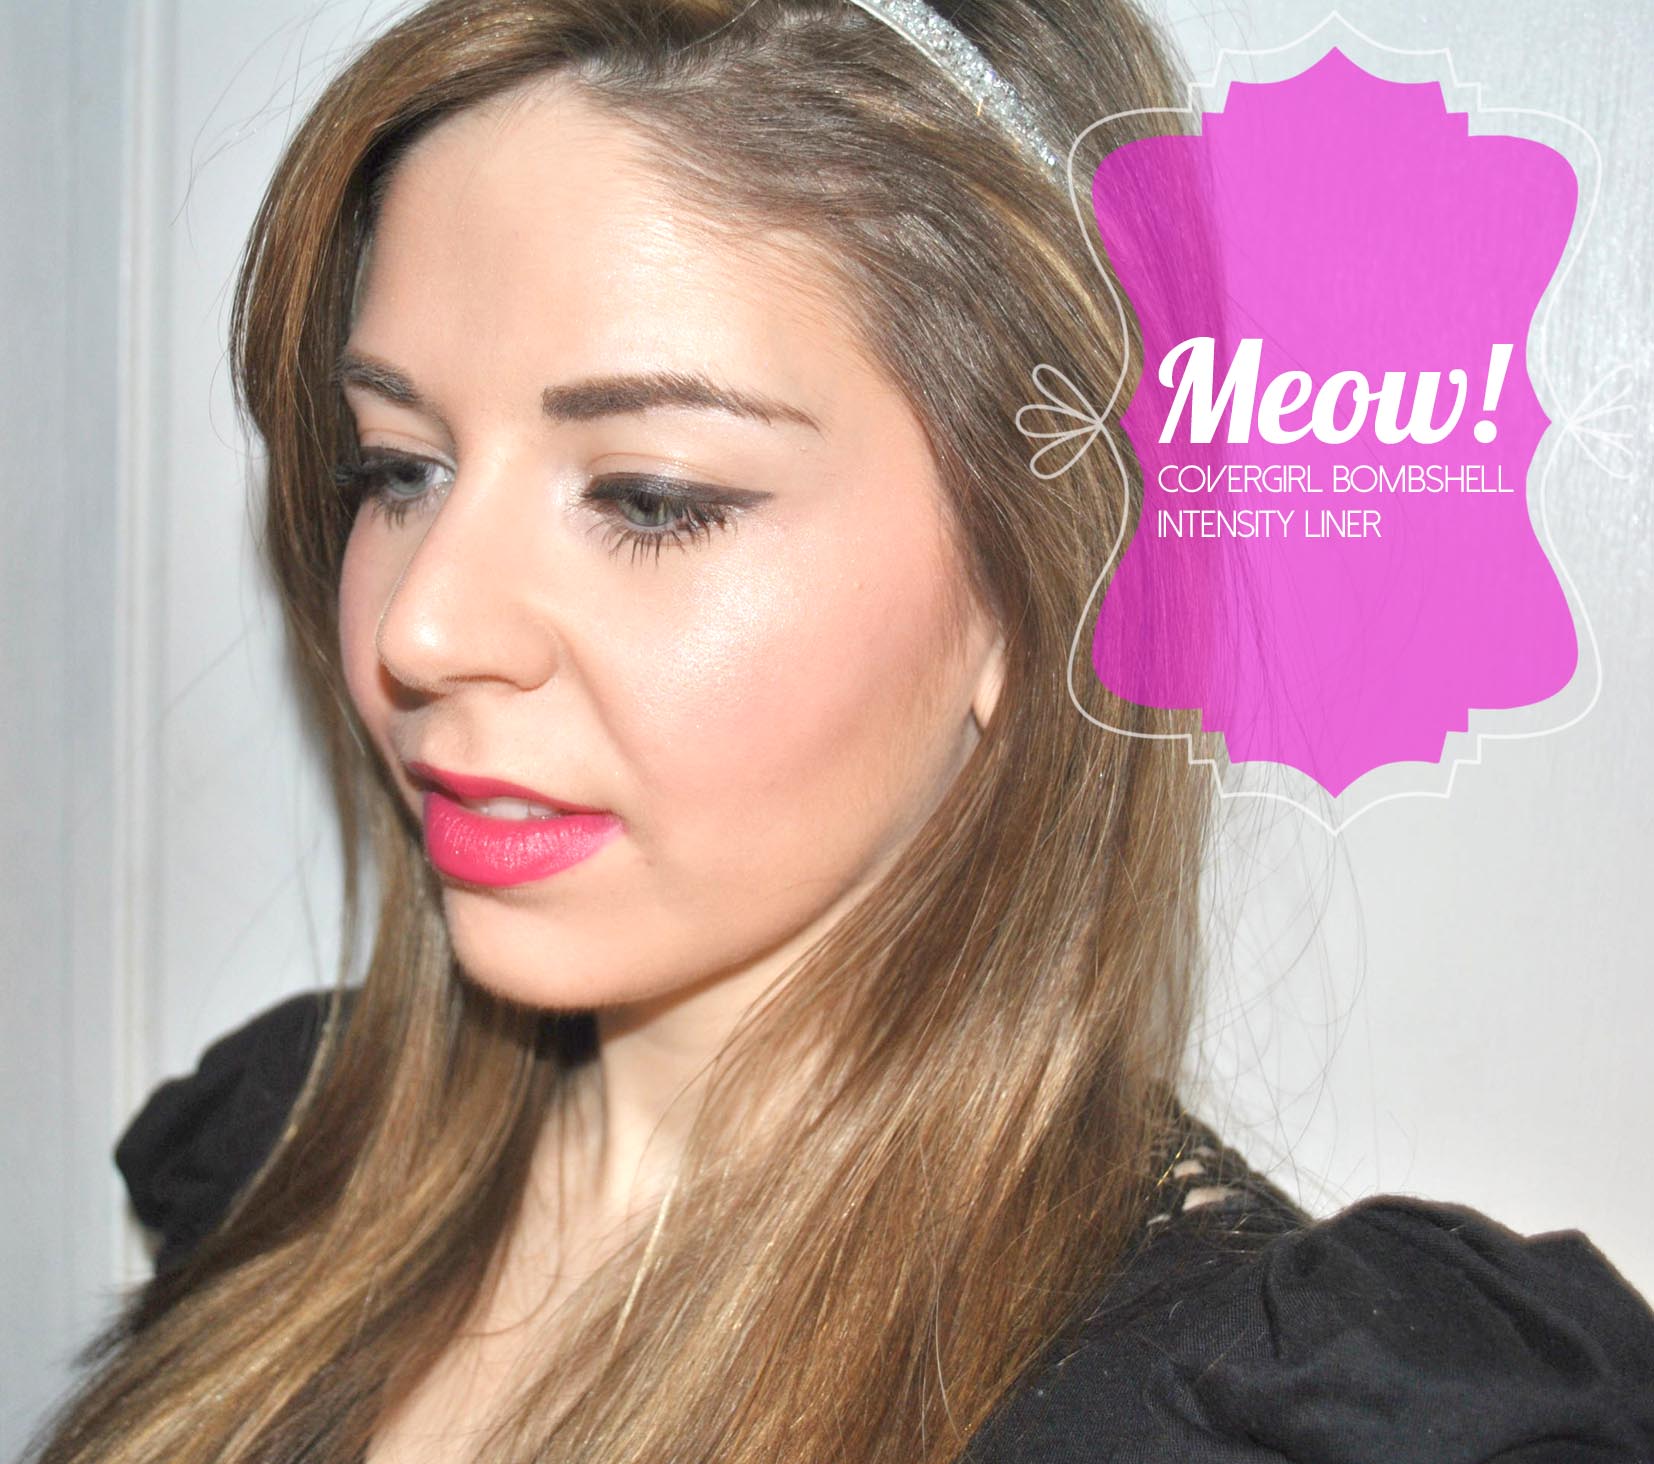
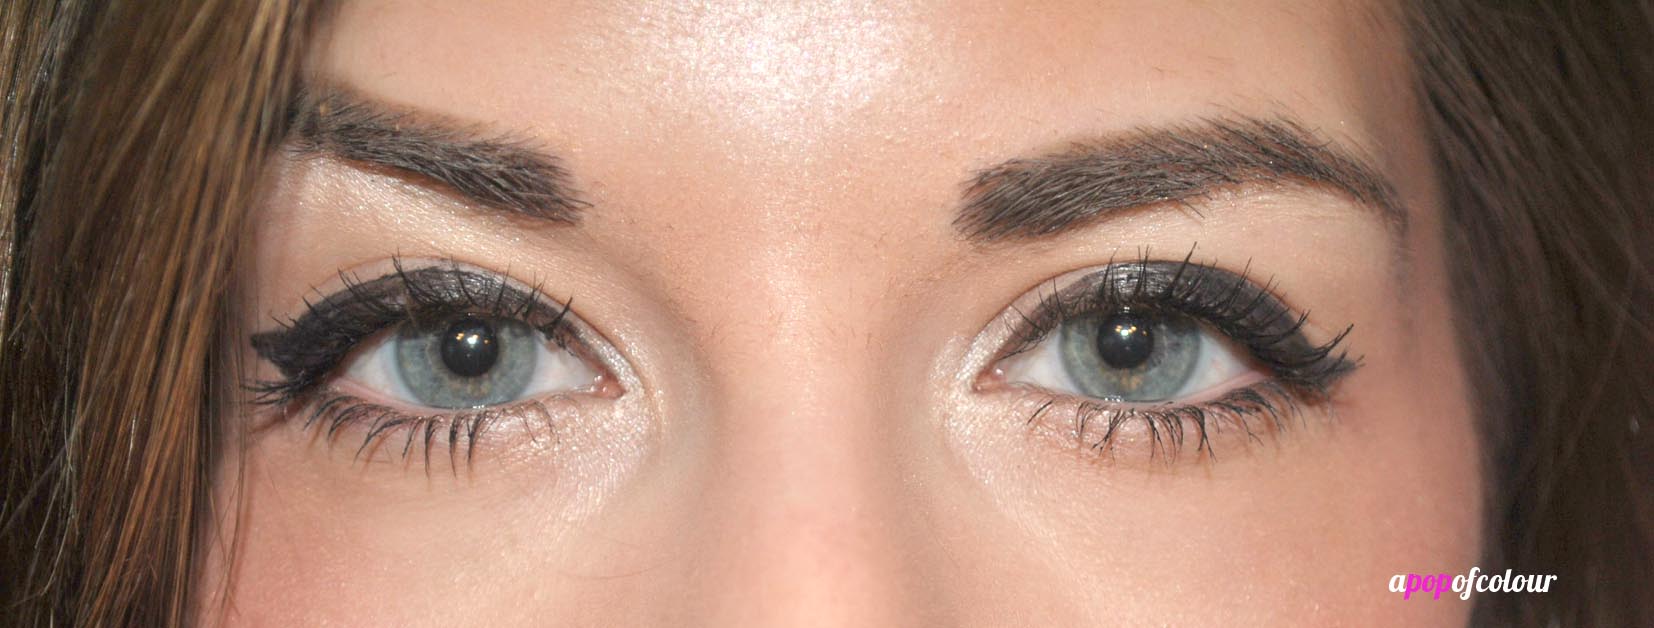
I couldn’t wait to dip in and try everything out. I created a look using the products from the new collection, including the brushes.

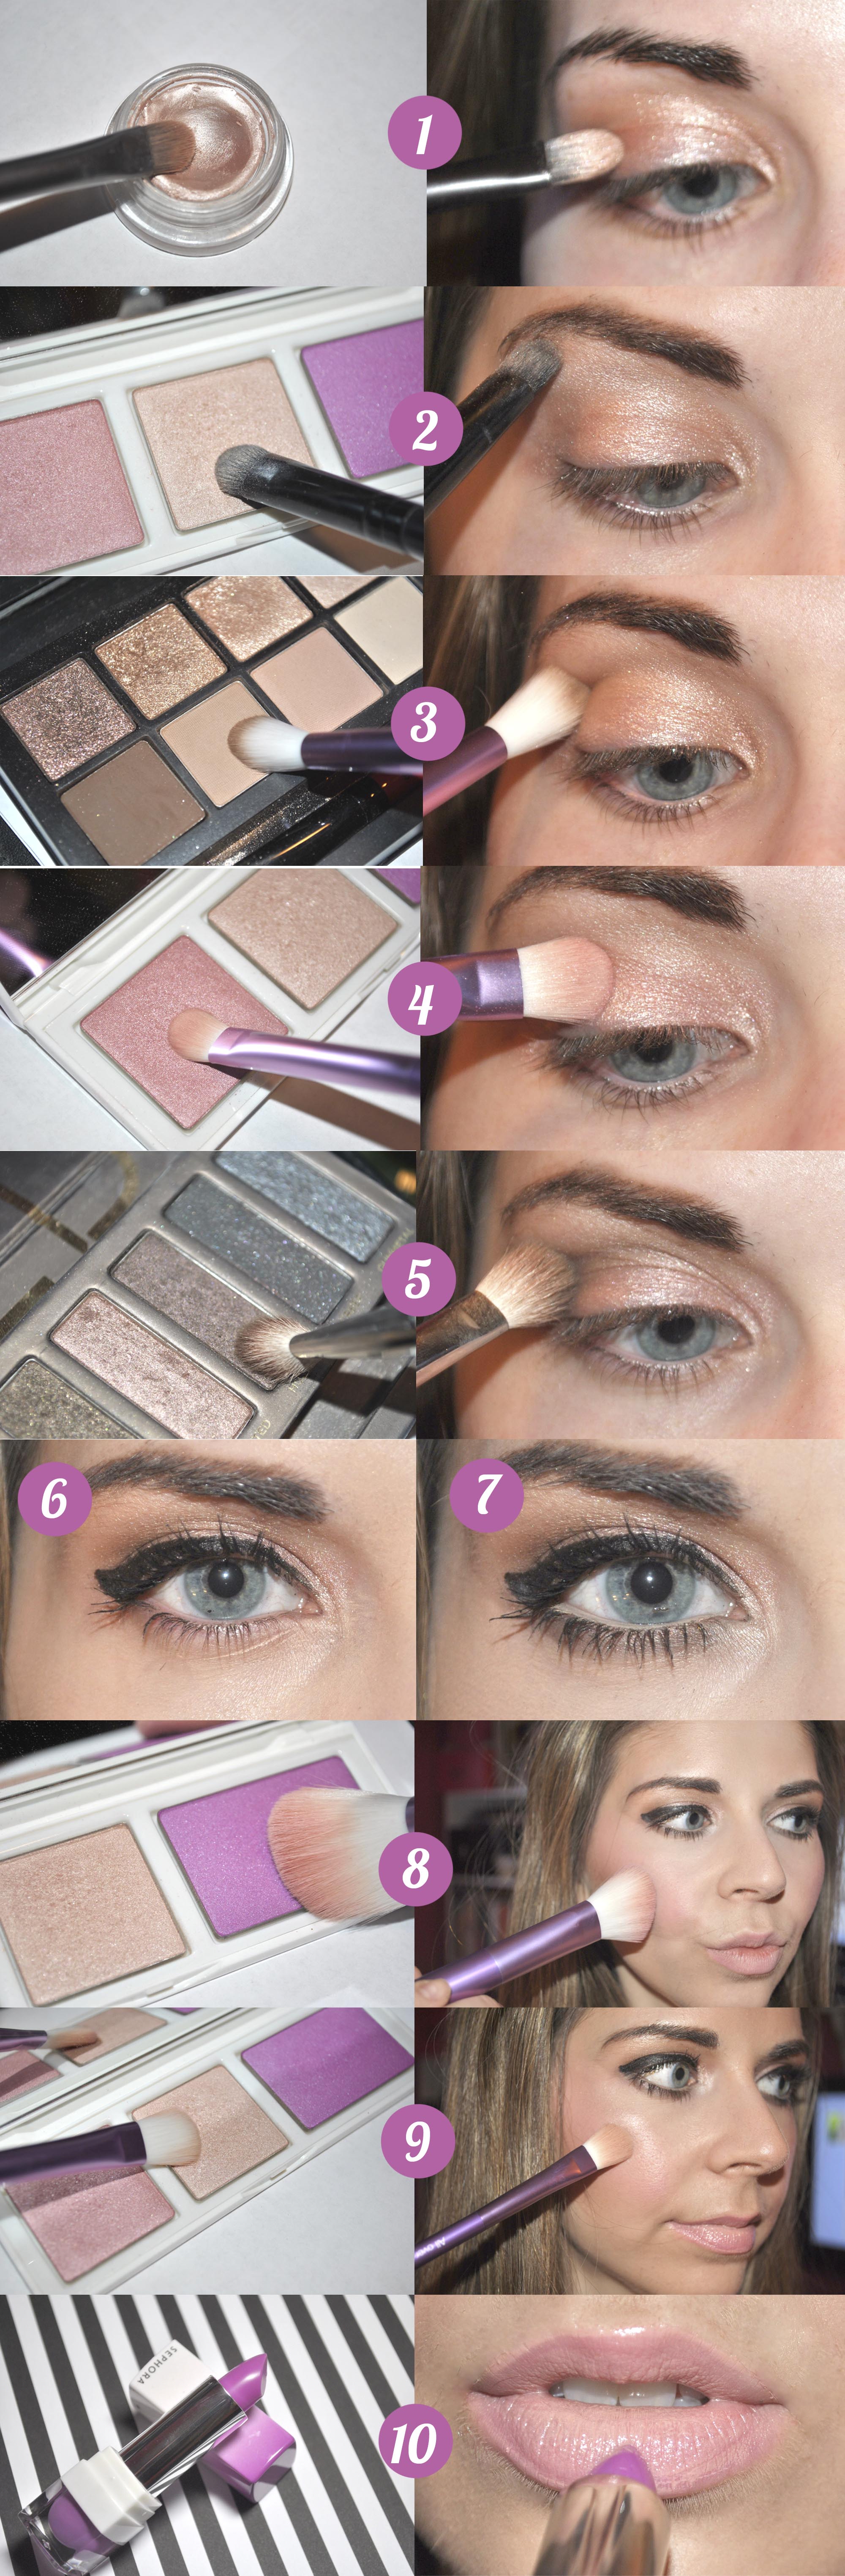
1. Starting the eyes, lay down an eyeshadow primer. Because we are going to use pink colours, I used Benefit’s Creaseless Cream Shadow in RSVP.
2. Fill in your brows, then with the champagne highlight from the Lustre Rush Cheek Sweep palette, sweep this along your brow bone.
3. With a light brown and a fluffy crease brush, like the one from the Color Gaze Brush Set, sweep this right underneath your highlight acting as a transition colour. The shadow I used was from the Smashbox Full Exposure palette.
4. With a shadow brush (I used the brush from the set), apply the pink highlight colour from the cheek sweep palette along your eyelids.
5. With a deep purple, like Hustle from the Urban Decay Naked palette and a crease brush (I used a MAC 217), apply this in your crease.
6. Line your upper lash line with a liquid liner, winging it out. Then, apply a couple coats of mascara.
7. With a pencil brush, or the lip brush from the set (that’s what I used), apply Hustle (or the deep purple shadow you used), along the lower lash line. Then apply a nude-coloured liner along your waterline. I used Rimmel London ScandalEyes Kohl Kajal in Nude. Then, apply a couple coats of mascara to your lower lash line. I used CoverGirl Lash Blast Clump Crusher.
8. Apply your foundation and concealer (I used CoverGirl Stay Fabulous and CoverGirl TruBlend Fix Stick concealer) and your contour bronzer (I used Too Faced Sun Bunny Light), and then with the angled blush brush from the brush set, apply the Radiant Orchid blush from the Cheek Sweep Palette. Note about this blush, a little goes a long way and it does go on patchy. I had to use my flat-top foundation brush to blend everything out.
9. With the All-Over Shadow Brush, apply the champagne highlight to your cheekbones.
10. For the lips, I first applied a nude lipstick, like Maybelline’s Bare All from The Buffs collection, then with the Venus Lure Lip Balm, layer this over top of the nude. The balm is very sheer but it’s buildable, so therefore the combo of the two leaves you with a nice pink-nude shade.
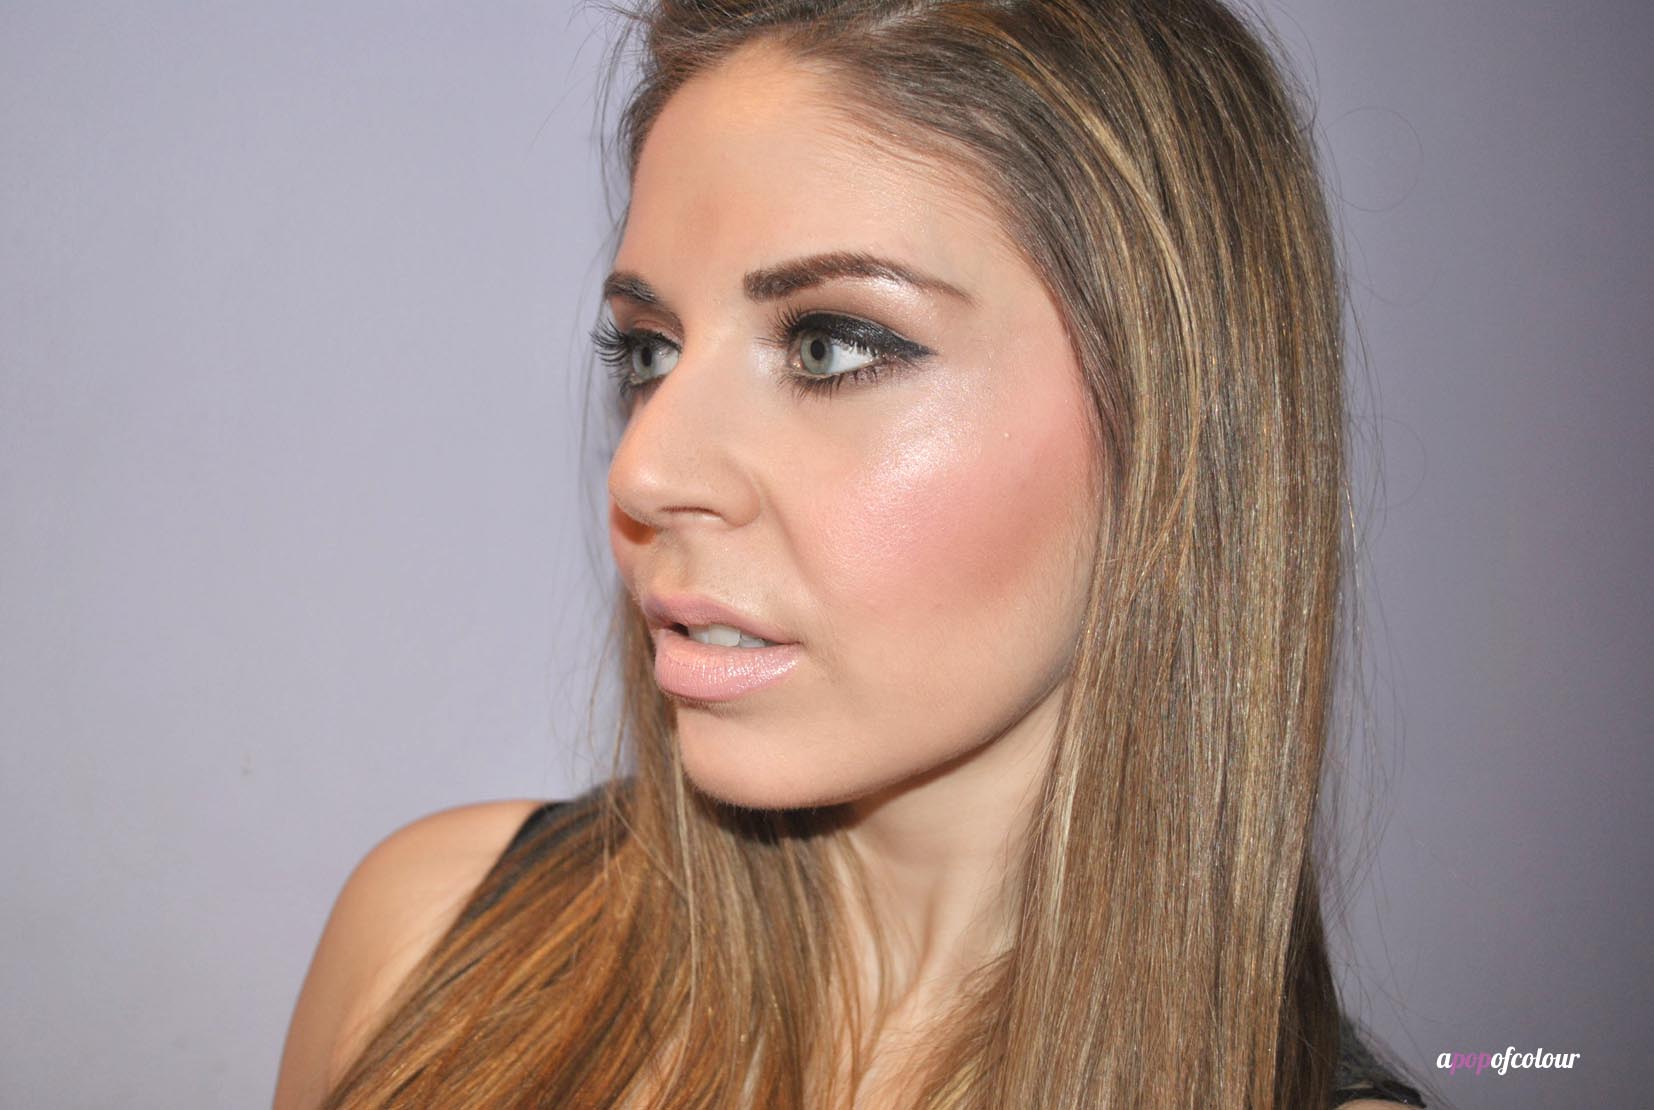
And that’s the final look! I love everything from the collection and am super impressed with the product offerings this time around. I love the cheek sweep palette and the brushes the most because I find the quality of the products are really nice (aside from the Radiant Orchid blush, because you really have to blend it out for it to look natural). The balm is also nice and it gives you that plumping effect. I really like layering it over top of another lipstick for a touch of orchid!
Are you excited to try out Sephora x Pantone Universe’s Radiant Orchid collection?
Like what you read? Check out these related posts:
- The lash diaries: Sephora x Pantone Universe Light Flicker mascara
- Northern lights: Sephora x Pantone Universe SpectraLights collection
- Candy crush: Benefit releases Lollitint cheek/lip stain
- Raindrops on roses… Too Faced A Few of my Favourite Things set