Oct
2011
Factory Girl: Edie Sedgwick Makeup Look
Four more days until Halloween! Halloween is my favourite holiday because not only do I love all things horror and candy but you get to dress up as someone else! And I mean who doesn’t want to be someone else for a day?
I was requested to recreate Andy Warhol muse, Edie Sedgwick, the original factory girl. She was also an “it girl” and heiress. Her signature look is very ’60s – the eyeliner in the crease, nude lips, big lashes.
This is an easy costume to recreate, all you need is a black or striped shirt, dark denim, and pull your hair back. If you want to really channel Edie, grab a cigarette or fake one (I’m not supporting smoking here but a lot of her photos show her with a cigarette). The real magic of her look of course is her makeup. You can also use this eye makeup with voluminous Brigitte Bardot hair for a sex-kitten look.
So let’s get started!
 Start with a clean canvas. The products I used were Hard Candy Sheer Envy primer then YSL Touche Eclat, MAC Pro Longwear foundation in NC15, and It Cosmetics Bye Bye Undereye concealer. I chose a pale foundation because Edie was quite pale, plus this foundation contains an SPF so therefore in photos I will look whiter than I actually am.

 Grab your bronzer and do some slight contouring of the cheekbones and your forehead. Be very light here, you don’t want to go overboard.
 Using a light pink blush lightly apply some colour to your cheeks. I used MAC’s Coygirl.
 Make sure to fill in your eyebrows because she had some thicker ones. Don’t go overboard with the thickness but just enough to make them more pronounced. Remember, it’s all about the eyes for this look.

 Using a white or silver eyeshadow, lightly pat the colour on your eyelids. I used Lancome Color Design Style Section Metallic.

 Grab your favourite black liquid liner and line your upper lash line winging it out. I used my handy tried and tested MAC Liquid Eye Liner.


 Now for the fun part. Grab a black eyeshadow (I used MAC Carbon) and lightly line where your crease is all the way from your tear duct to the outer edge then connect it to the winged part you created on your upper lash line. I had to draw it on a few times until the colour got dark enough. When I got it down pat I actually grabbed a brush and smudged it a bit then took my liquid eyeliner and went over it for a more defined look.

 Next grab your white eyeliner and line your waterline. I used a NYX eyeliner in white ($3.99 at Zellers).
 Now grab your black eyeliner and line your lowerlash with it.


After that I actually grabbed a white eyeshadow and went over the white on my lower lash line to really make that white pop.
 Grab your liquid eye liner once again and go over the black on your lower lash to define the look.
Grab a highlighter and highlight under your brows. I used It Cosmetics Brow Power Lift.


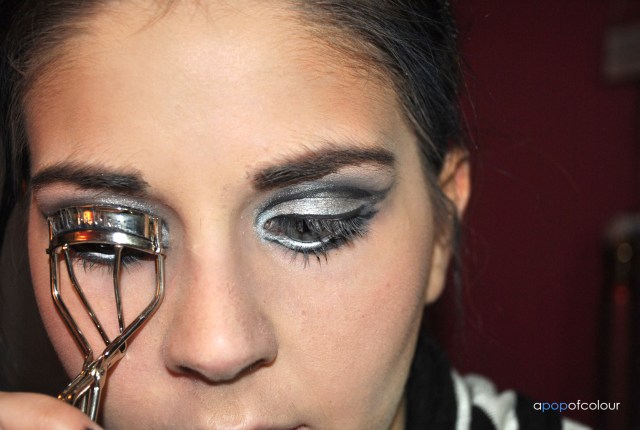
 Now the final steps are to curl your lashes and apply mascara. I actually used a primer before my mascara to get maximum volume but it’s not necessary. I didn’t use fake lashes for my eyes but I would definitely recommend them (I didn’t have my glue handy). Luckily with my YSL Faux Cils mascara my lashes looked fake enough, but for extra effect I would for sure add wispy lashes to the outer corners to make the eyes pop even more. Heck, I would even add some falsies to the bottom lashes as well.
Lastly, apply a nude coloured lipstick, or if you don’t have one use concealer to blank out your lips. MAC’s Myth would be perfect for this look, I used my It Cosmetics concealer to wipe out my lips because I lent that lipstick to a friend. Either one works.
And voila! We are done!
Hope you enjoyed the look! Don’t forget to subscribe :).


