
Feb
2014
Sultry seduction: a sexy Valentine’s Day look
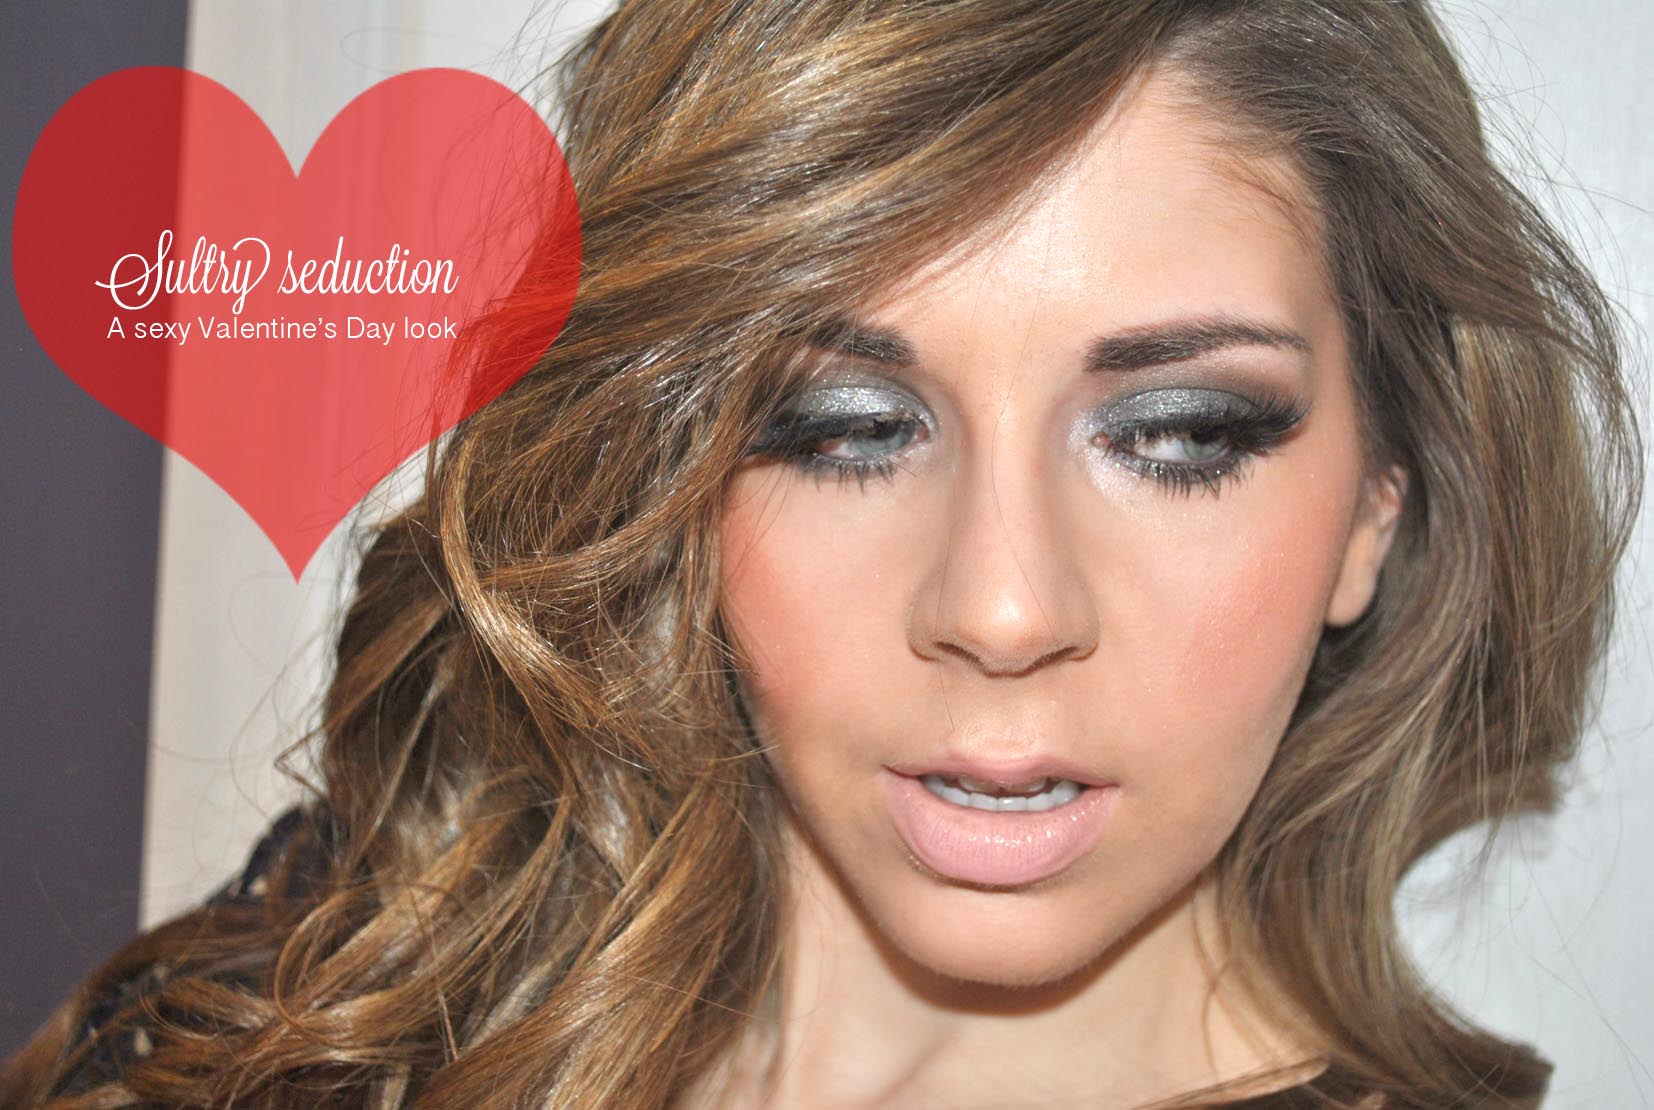
Happy Valentine’s Day! Although many just think of it as a Hallmark holiday, the day is much more than that. I’m wearing my favourite “Love” tank from H&M, rocking pink on my nails, and my valentine is my American Eskimo dog Ziggy (aka my main man).
I’ll be heading to a dessert place tonight with my other valentine – or should I say my palentine/bestie/PR girl/life coach – Jessica and eat red velvet, but if you have a hot date tonight and want to up the sex factor, I have created just the look for you.
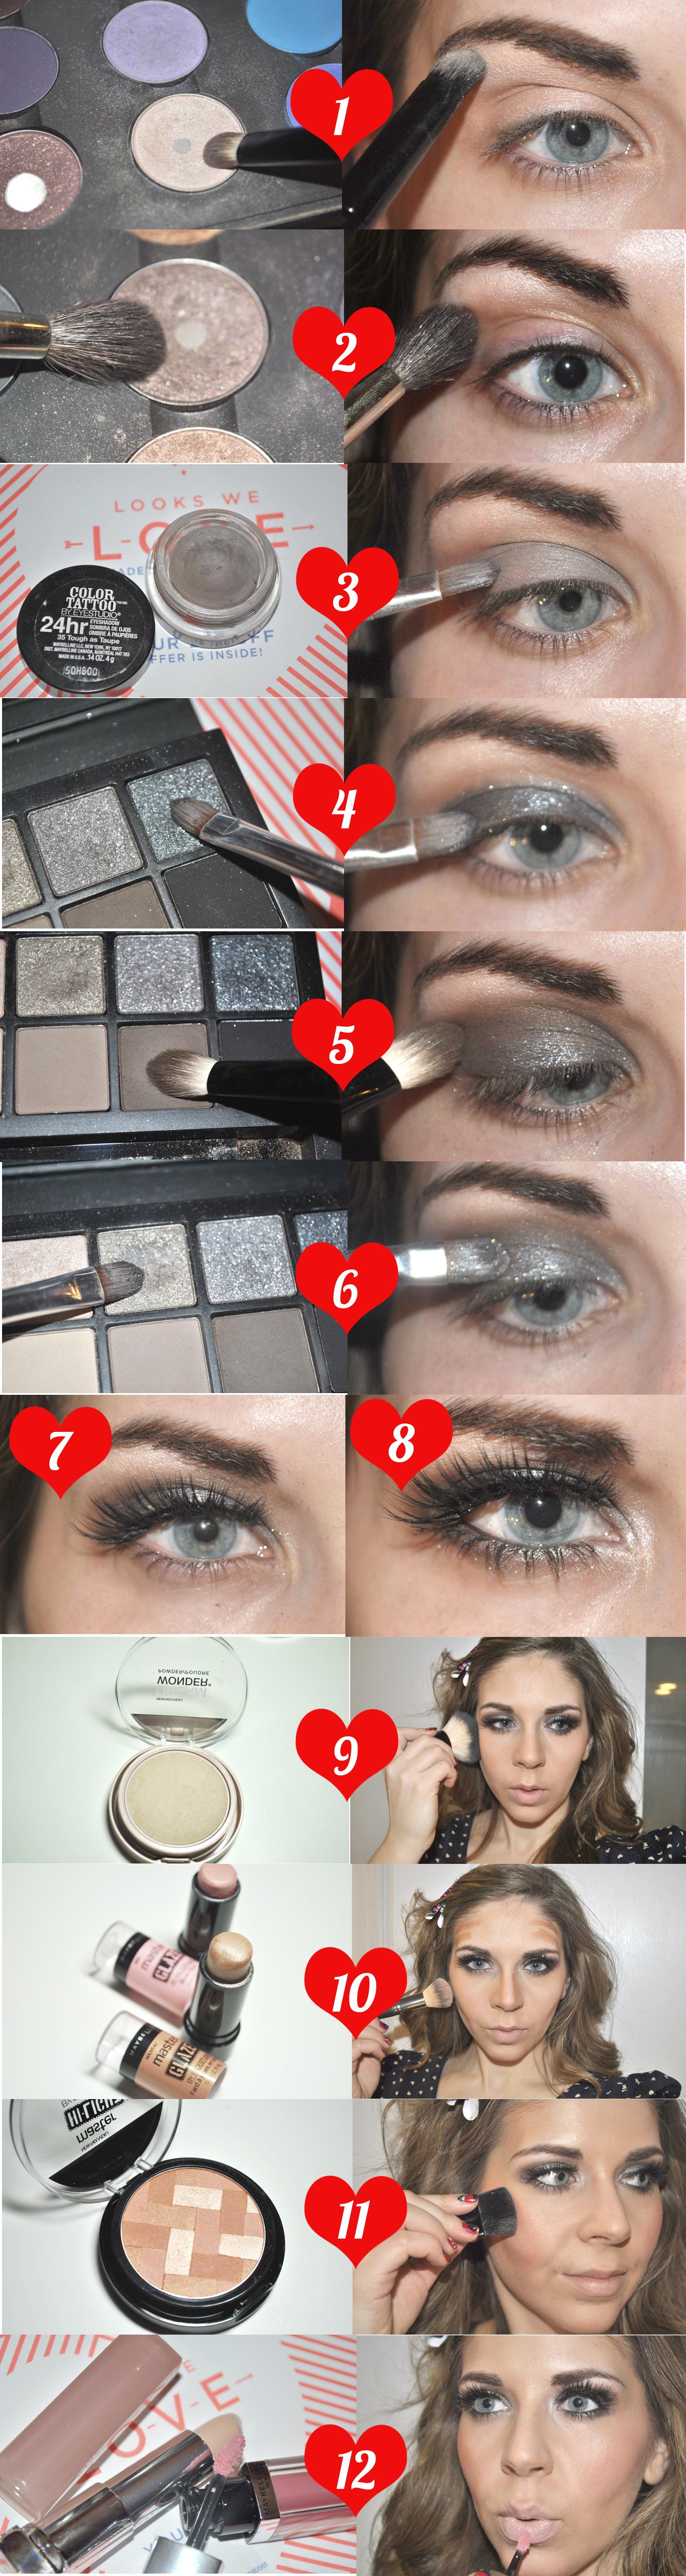 1. Starting with the eyes since we are using dark colours, fill in your brows, then using a white shimmery colour, apply this along your brow bone. I used MAC Phloof! eyeshadow.
2. With a taupe shade, apply this with a fluffy crease brush right underneath your highlight, acting as a transition colour. I used Satin Taupe by MAC.
3. With a taupe cream shadow, acting as a base, apply this using a flat shader brush to your lids. I used Maybelline 24 Hour Color Tattoo in Tough as Taupe.
4. With a shimmery grey eyeshadow and a flat shader brush, pat this over the taupe base on your lids. The colour I used was from the Smashbox Full Exposure palette (the darkest glittery colour). These do tend to have a lot of fall out, so if you are using this palette, make sure you spray your brush first with either water or a setting spray so it adheres better.
5. With a matte dark taupe colour and a blending brush, work this into your crease, blending everything out.
6. With a silver colour, apply this on the centre of your lids, just to brighten up the lid area. The colour I used was also from the Smashbox Full Exposure palette.
7. Since the lids are so smoky, no liner is needed. Instead, curl your lashes and pop on some dramatic falsies. I used Velour Lashes in Lash in the City.
8. With that same sparkly grey colour we used on the lids, apply this along your lower lash line using a pencil brush. Then, apply a couple coats of mascara to your bottom lashes.
9. Moving onto the face. Apply your primer first, then put on your favourite liquid foundation. I used IT Cosmetics IT-O2 Ultra Repair Liquid Oxygen Foundation in Light. Over top, I used Maybelline Dream Wonder Powder in 15 Ivory over top to set it. Between the liquid and powder, I was left with perfect coverage.
10. For contouring and blush, I chose to go with a cream format. First, using the Maybelline Face Studio Master Glaze in Warm Nude, I applied this to the hollows of my cheekbones, my temples, along the sides of my nose and chin. Using a face brush, I buffed it all in. Then for blush, I used the same product but in Just-Pinched Pink on the apples of my cheeks and blended it up.
11. For a highlight, I used Maybelline’s Face Studio Master Hi-Light in Coral to my cheekbones for some extra colour and shine.
12. For the lips, I chose to go with two Maybelline products. First I applied the colour Bare All, which is a concealer-looking shade from their Color Sensational The Buffs collection (full review coming soon!). Over top, and to add some colour, I applied the Color Elixir by Color Sensational lip colour in Petal Pusher, a pretty baby pink gloss.

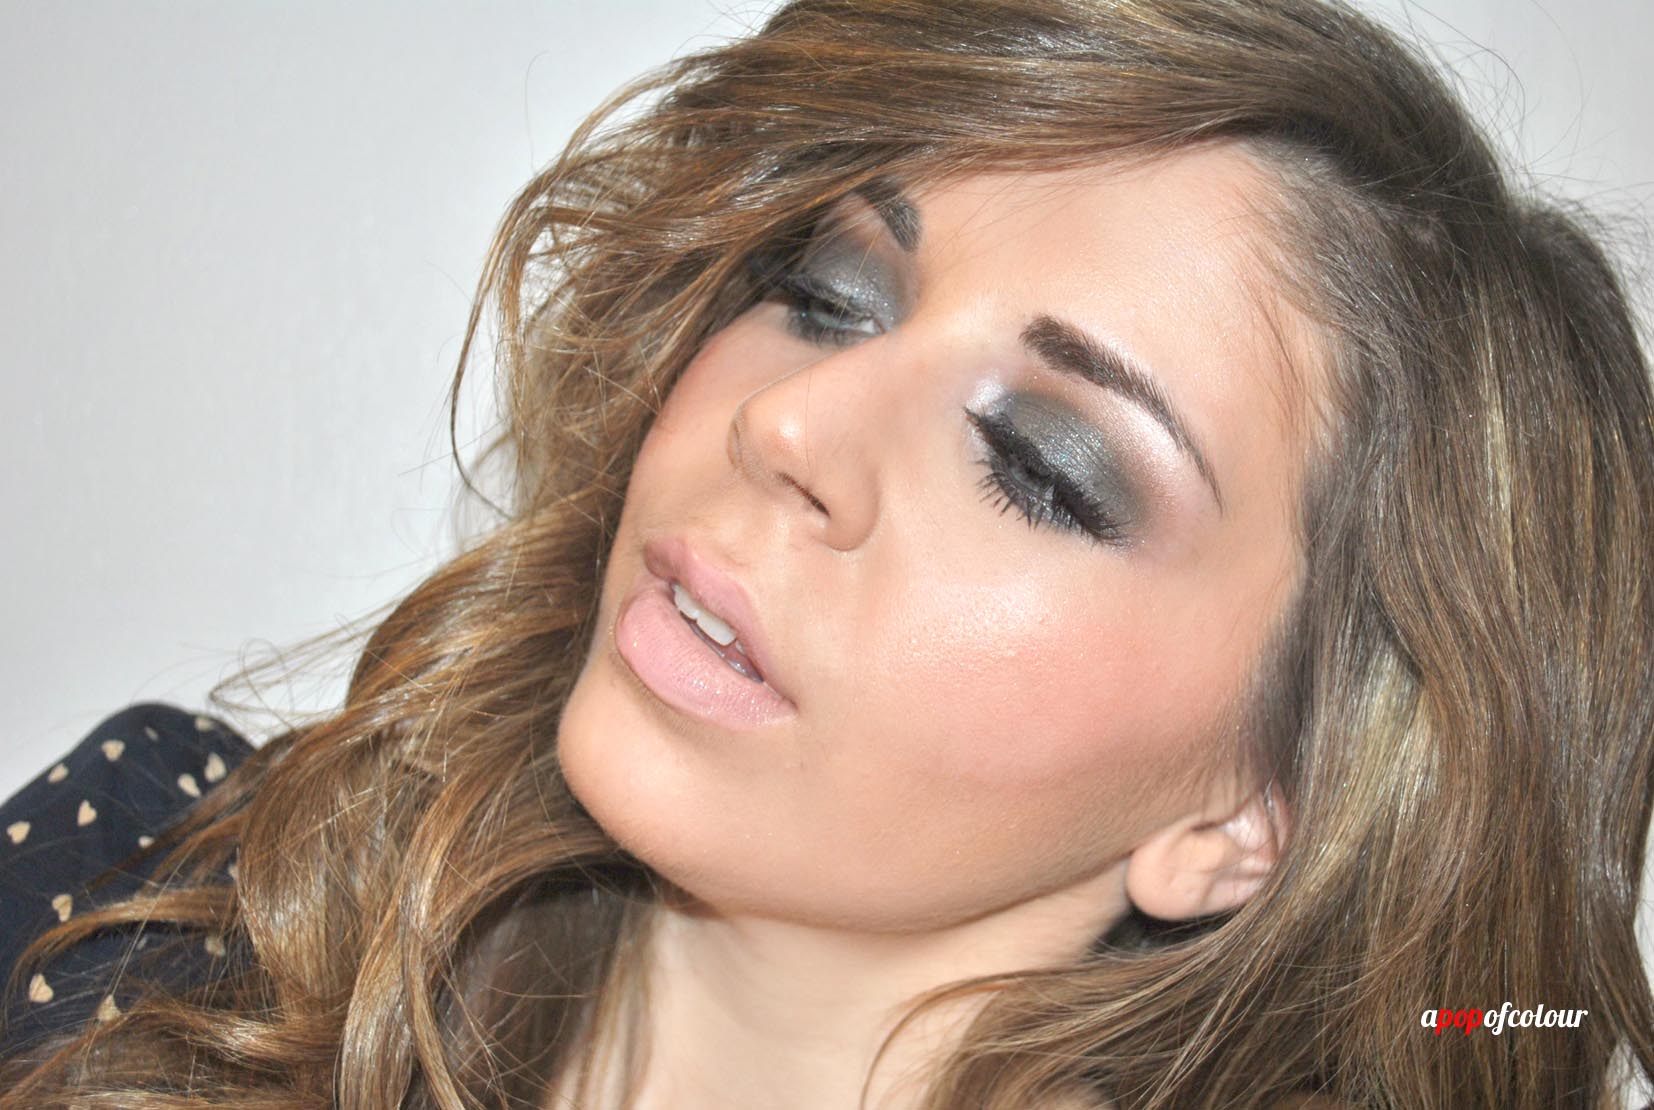
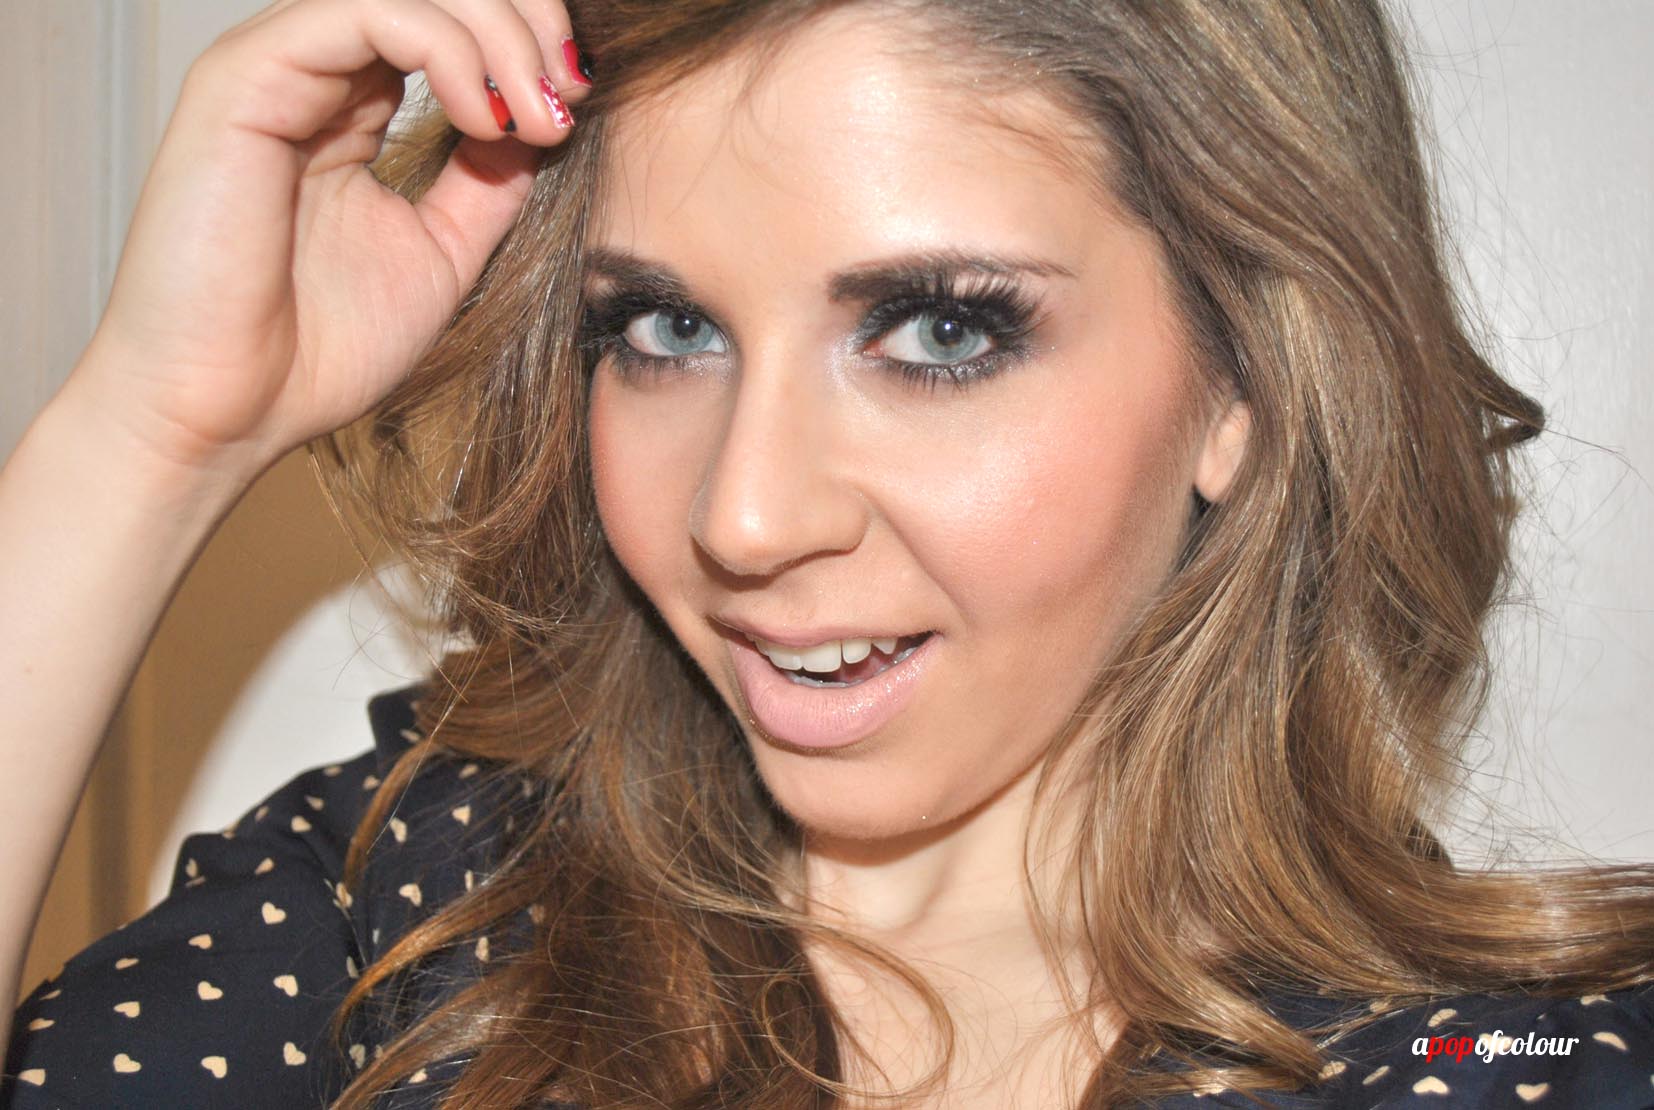
And that’s the final look! I actually forgot to apply a concealer, but judging from the photos, it doesn’t look like I really needed one. If I would have remembered, I would have applied IT Cosmetics Bye Bye Undereye in Light to highlight the area.
I love how this look came out and it’s definitely a lot more mature than the sweet look I posted on Monday.
I hope you all have a fab Valentine’s Day with whoever you spend it with!
Like what you read? Check out these related posts.
- Ooh la la! Valentine’s Day Gift Guide, plus giveaway!
- How to be a #bombshell!
- Lovespell: a sweet Valentine’s Day look
- Bring on the glitz!