
Apr
2013
Glamour-eyes! Red lip. Winged liner. A tutorial.
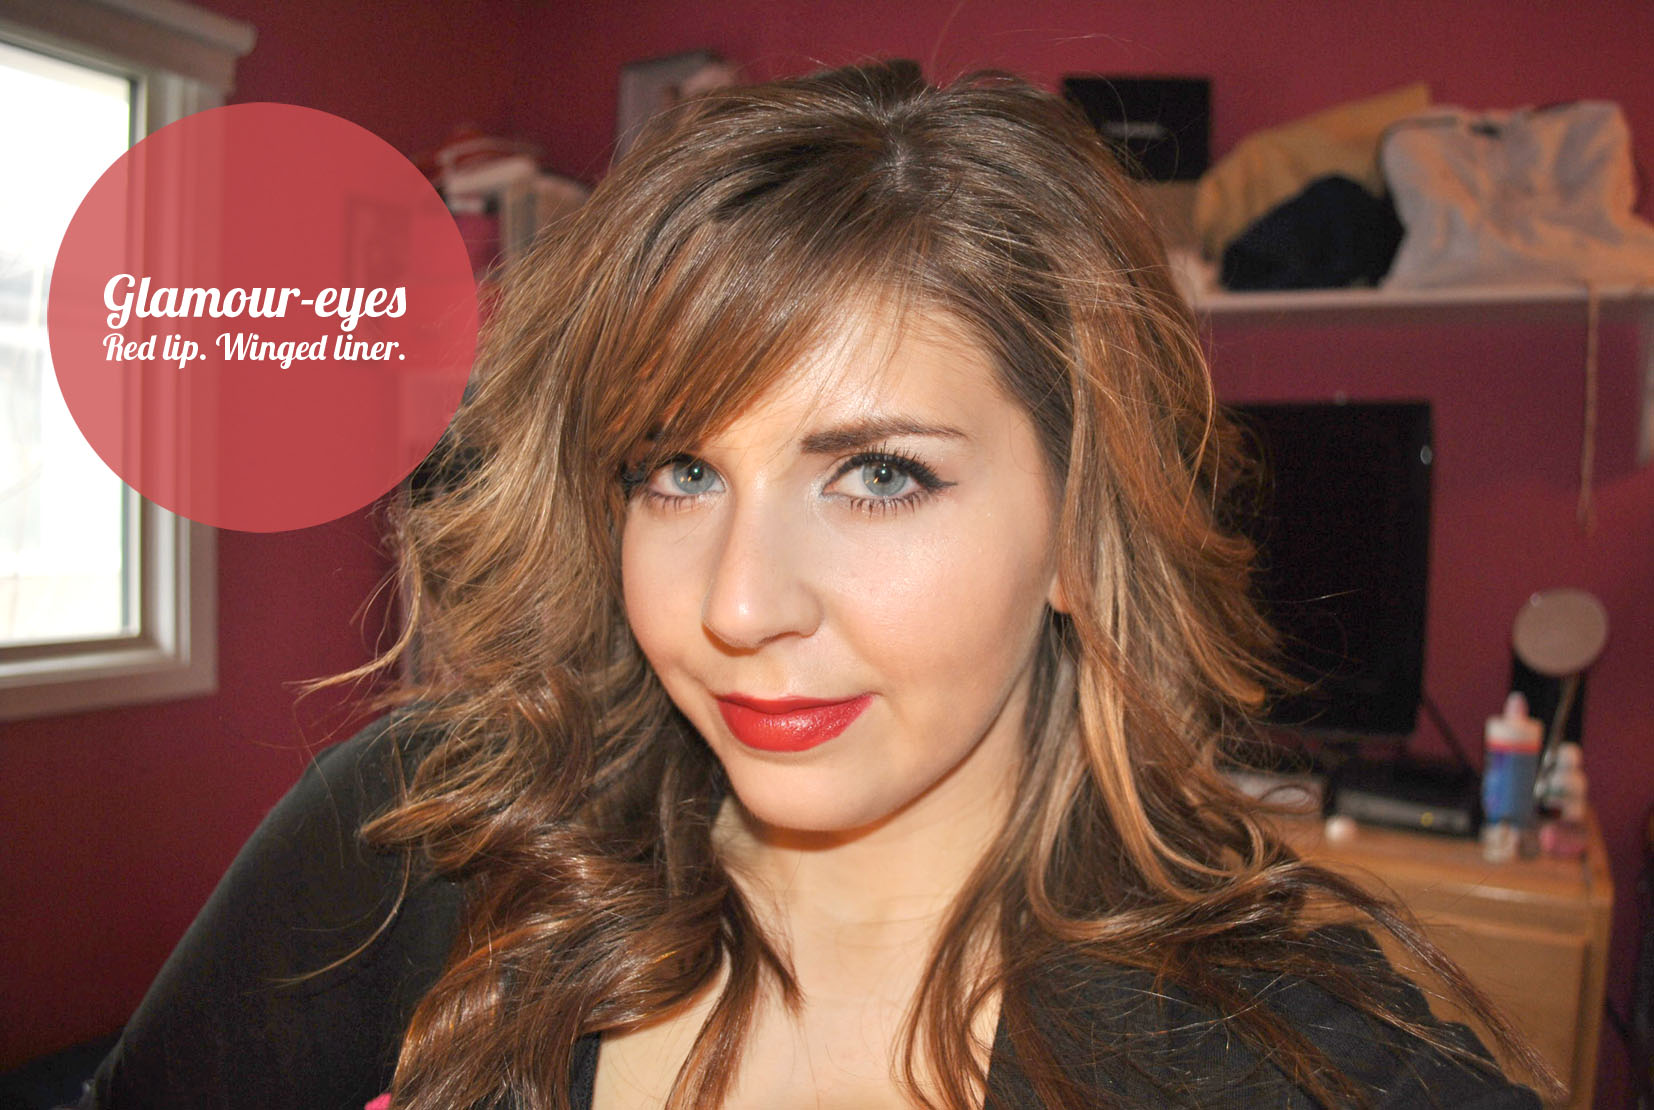
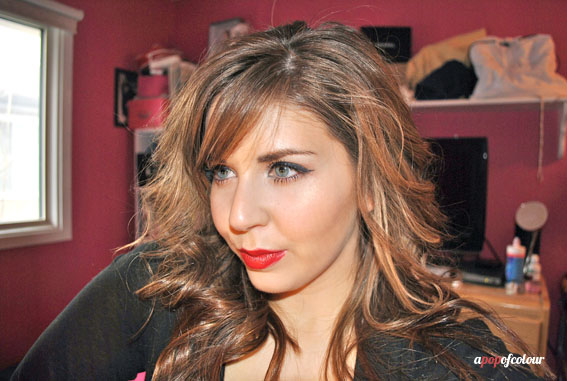
Nothing speaks glamour to me more than a bold red lip and a winged liner (with big lashes to boot). I’m not one to typically wear a red lip because it’s so hard to maintain throughout the day and it can get a little messy (especially when you eat), but every so often I pull out my favourite red lipstick and rock it on a day when want to feel all grown up and mature ;).
A winged liner on the other hand, I have been obsessed with. You can do a wing with really any type of eyeliner, whether it’s pencil, liquid, or gel. I chose to do this one with a gel liner, a new one that I have been obsessed with, Rimmel London’s ScandalEyes Waterproof Liner in black.
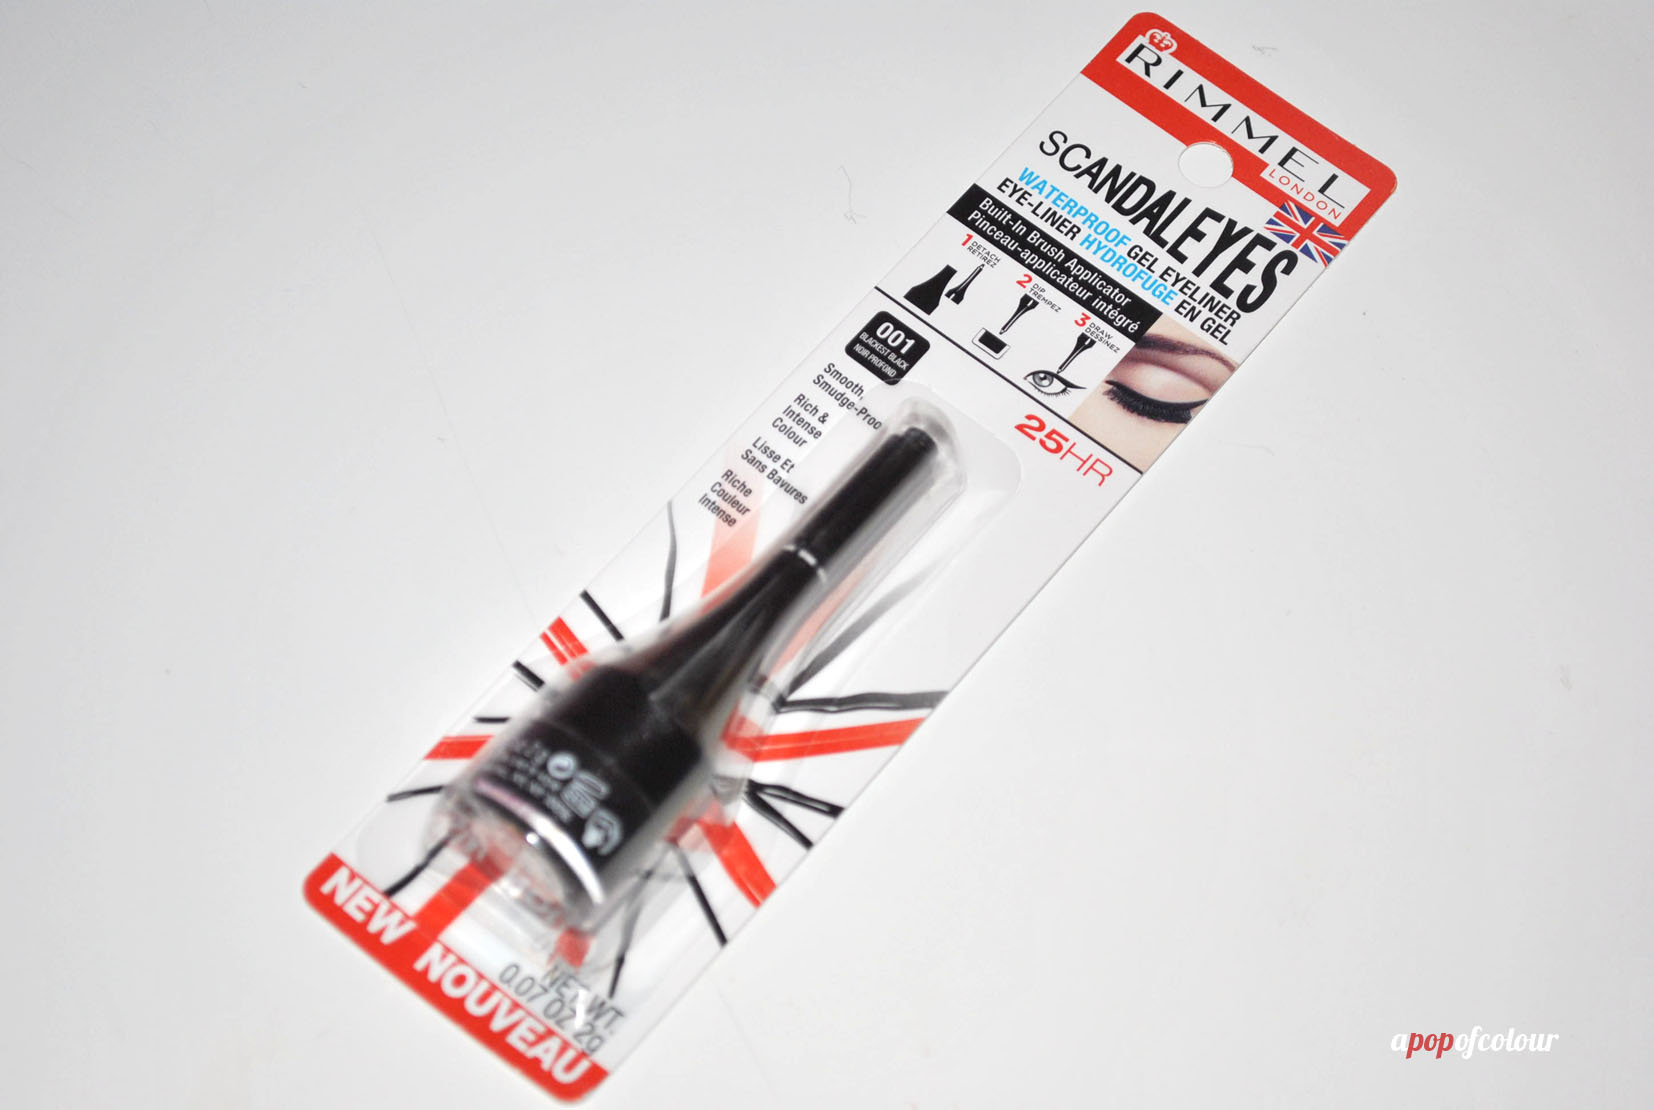
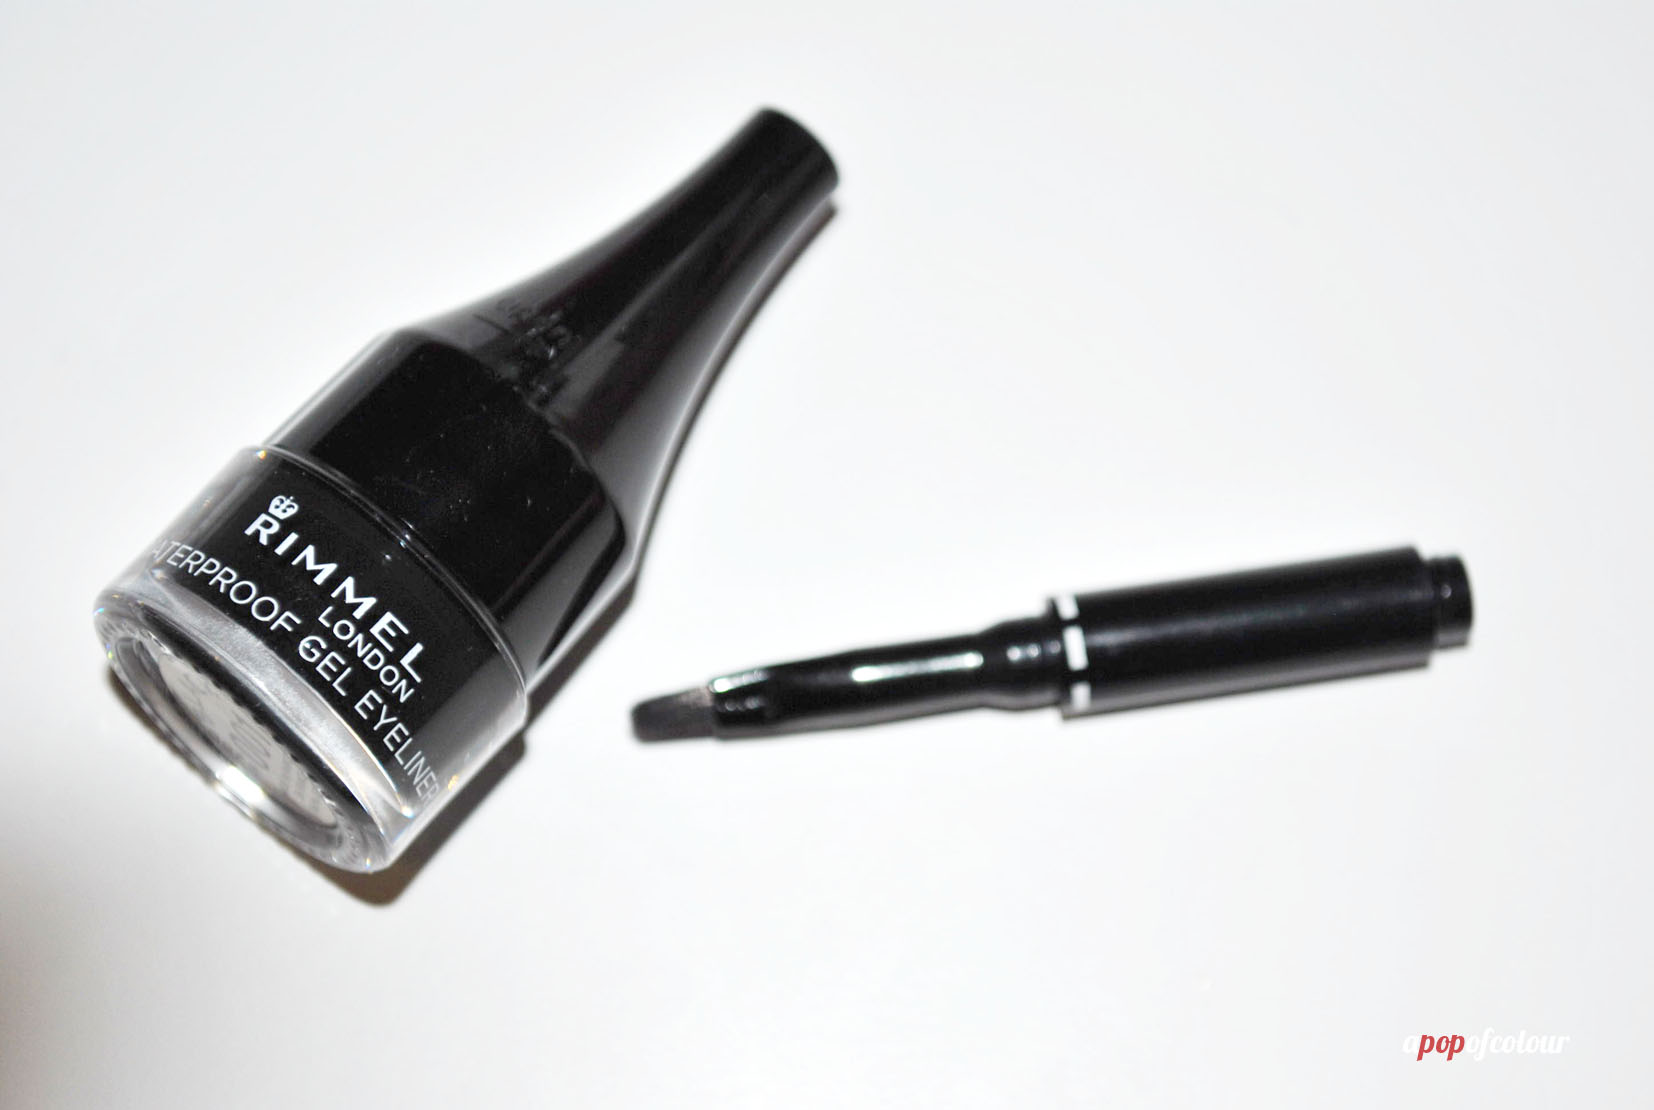
The product, available at drugstores (aka affordable), comes in a pot with a hidden wand. I do use the included wand and it works fab. I have been rocking this liner ever since I got it, and it’s very long wearing and best of all, stays put! I have another gel liner from Buxom and that one does not compare to the fabulosity of this one.
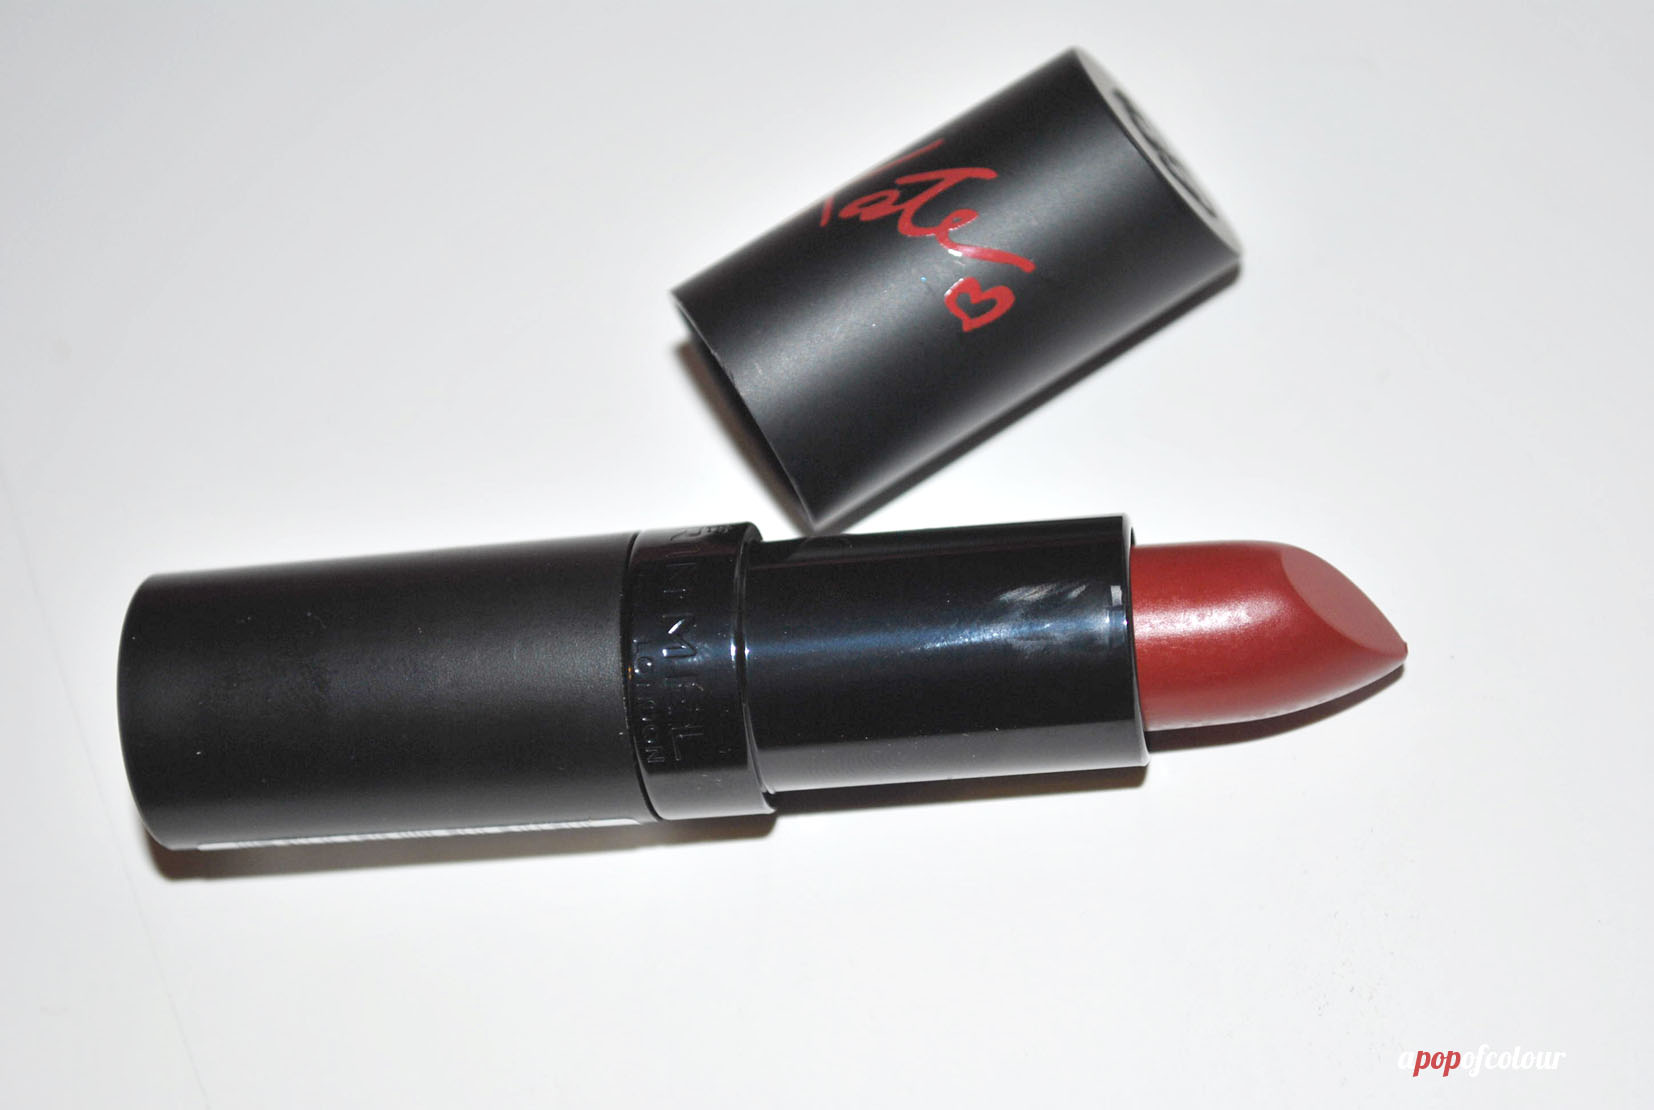
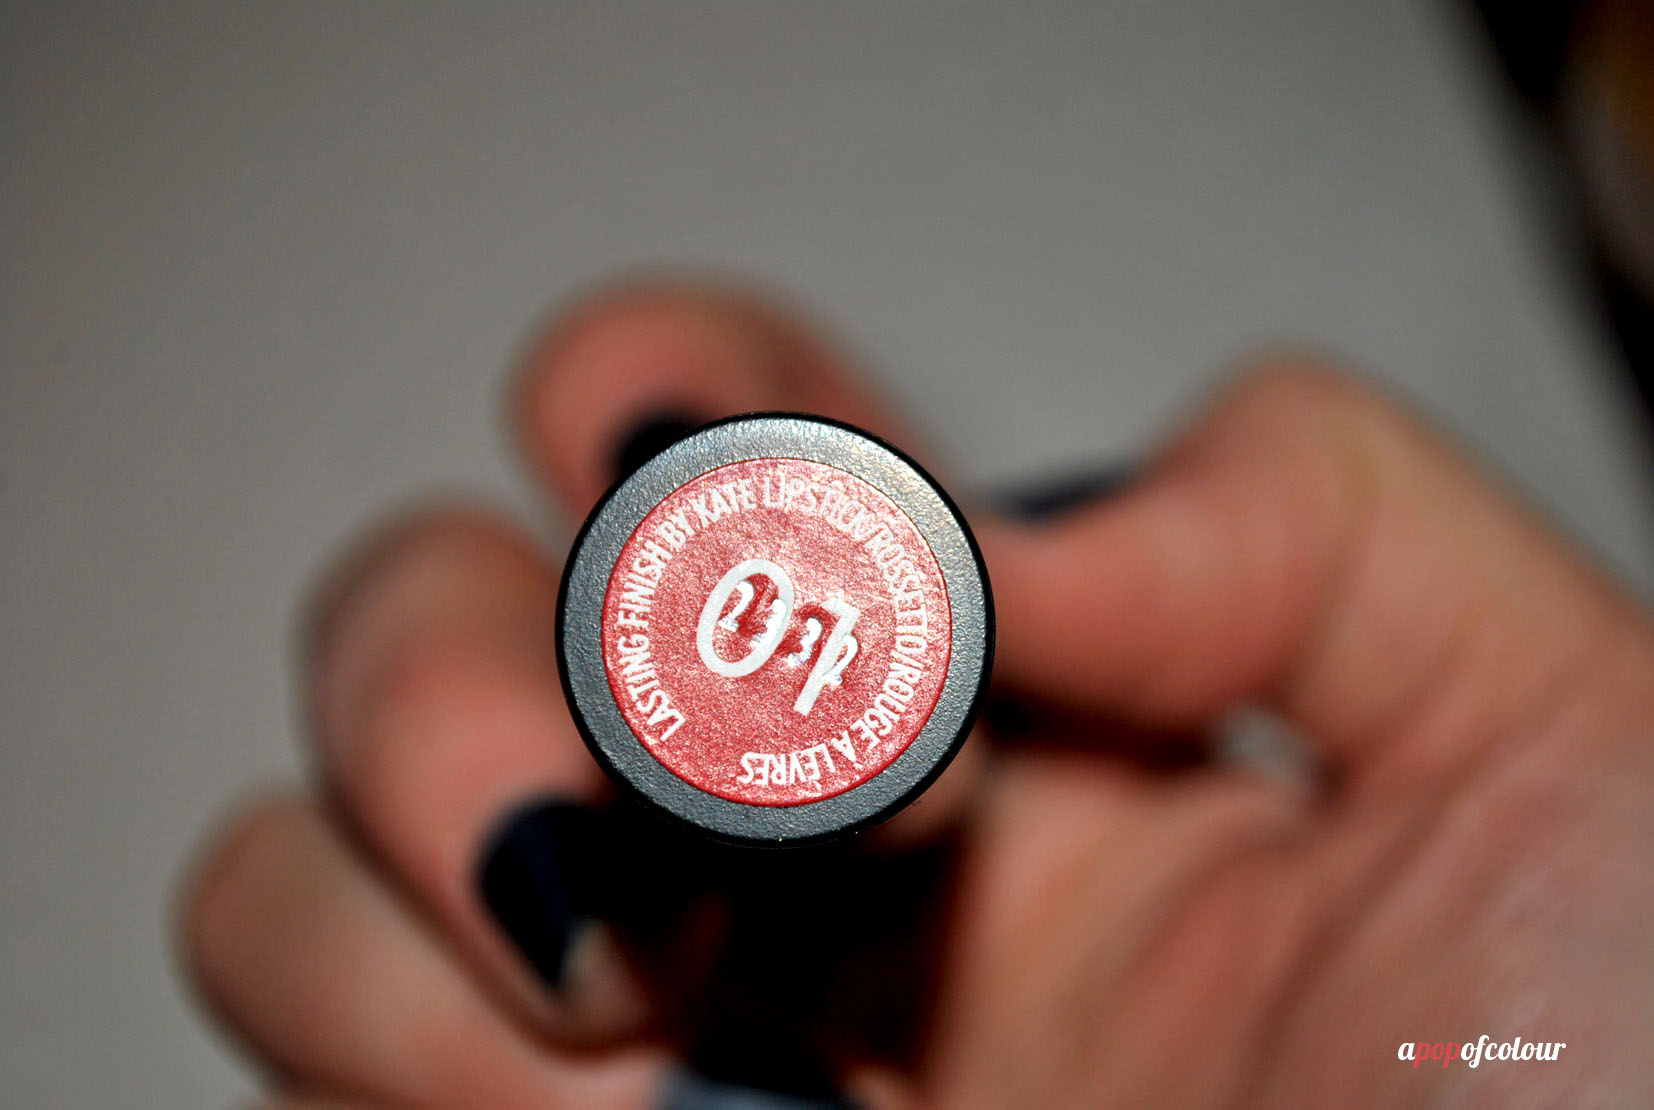
For the red lip, I chose another Rimmel London product, their Lasting Finish by Kate (as in Moss) Lipstick in shade 01, which is a deep glamourous red. The lipstick is billed to provide lasting colour for up to eight hours and is infused with black diamonds to reflect light. The lipstick was very shiny, however, it looked pretty drab by the eight hour mark. I recommend reapplying this shade every time you eat to maintain the look. As a side note, I want to mention that I am obsessed with the scent of this product, it smells like cherry Chapstick (insert Katy Perry reference here).
Here’s how to create the look!
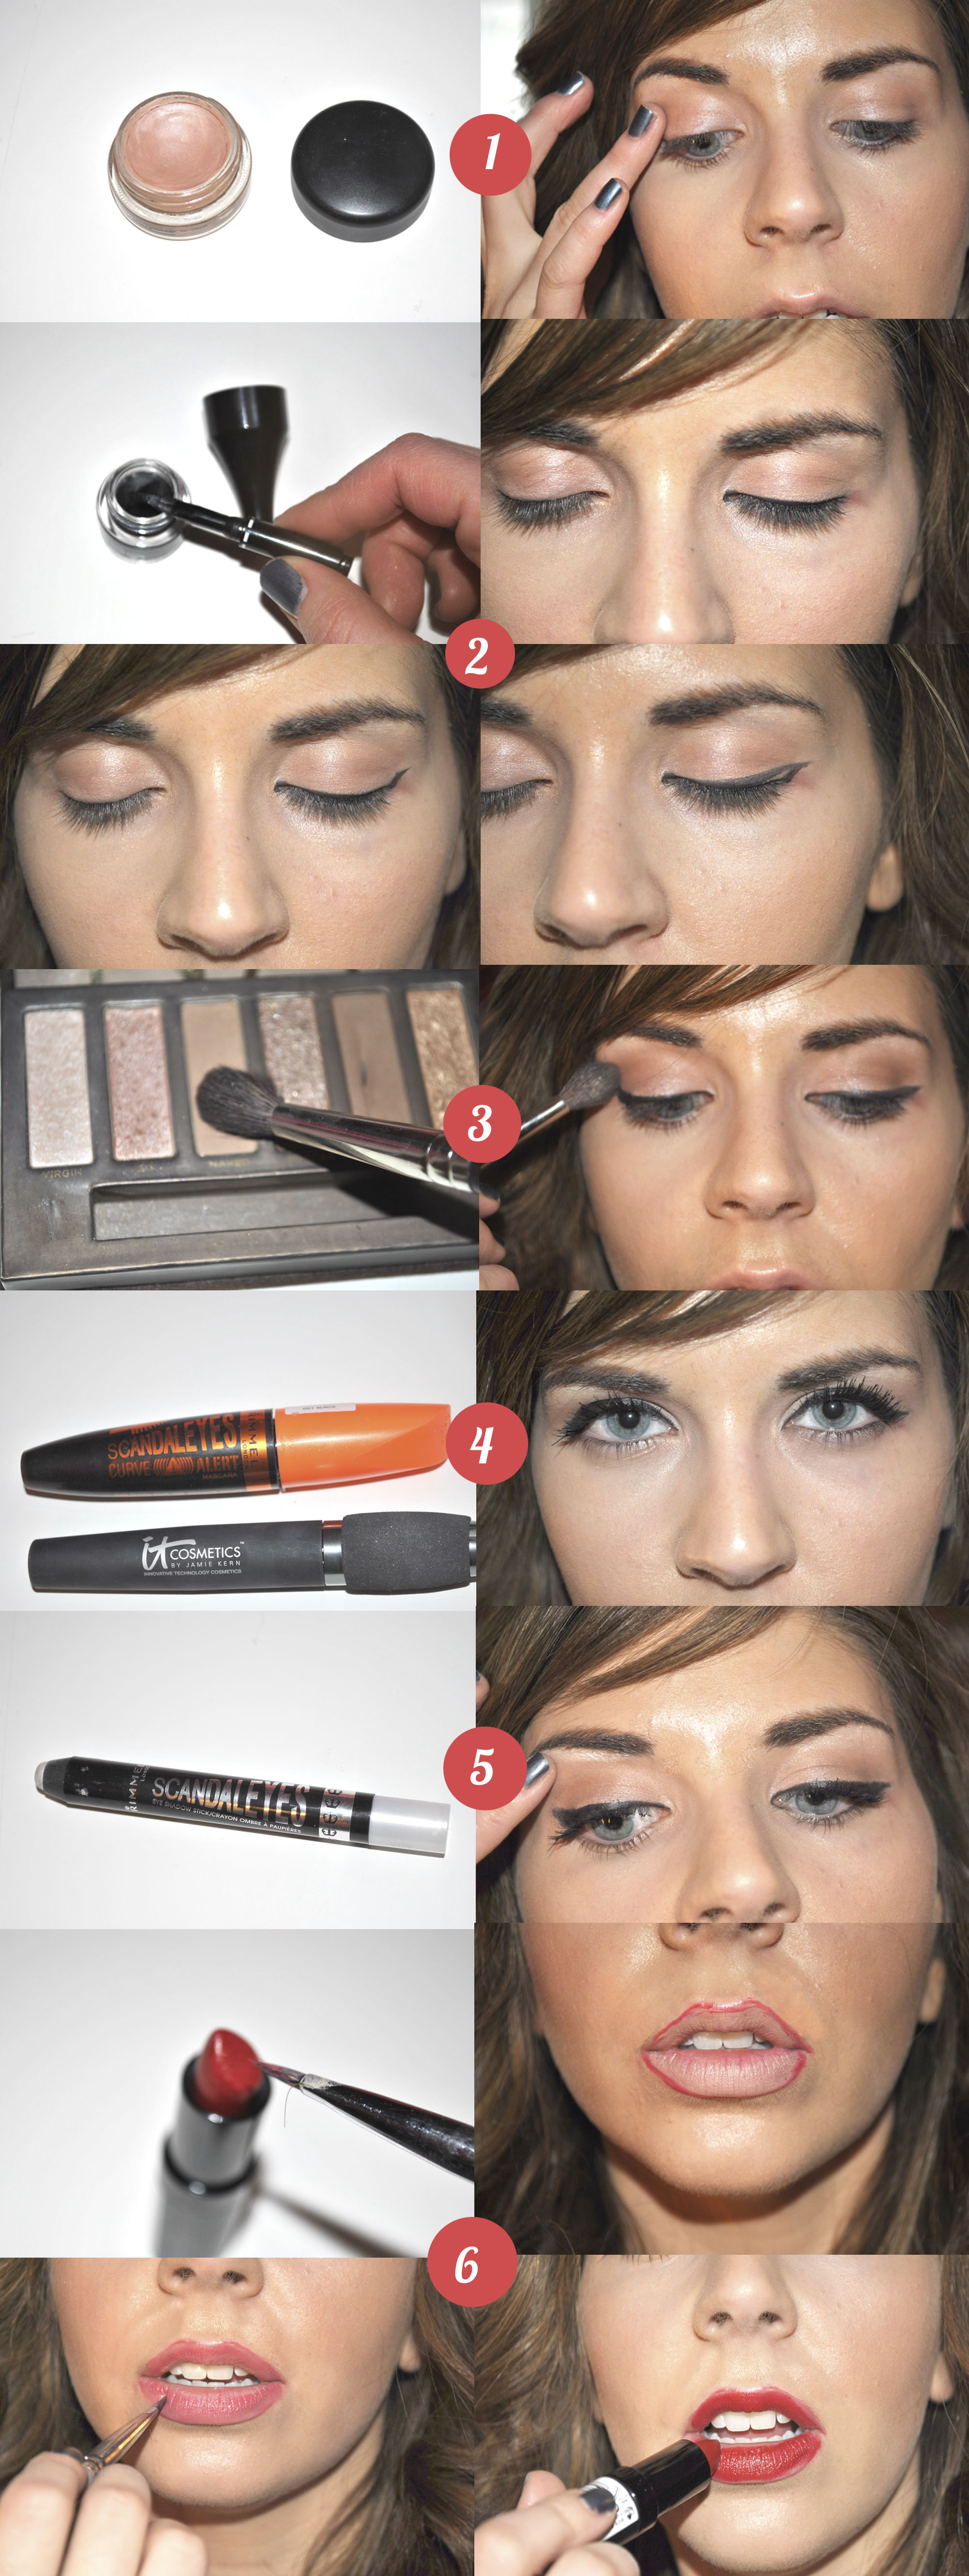
1. Apply your regular foundation, concealer, blush, and bronzer. After, with a nude base, like MAC’s Paint Pot in Nubile, apply this all over your lids.
2. Grabbing a gel liner, like Rimmel London’s ScandalEyes Waterproof Gel Liner in black, paint a thin line along your lashline. Then at the end, draw the line out at an angle towards the end of your brows. Connect that angled line with your original line, drawing it at a diagonal angle until it connects. Finally, paint the gap in.
3. This step can be done before the liner. With a crease brush, apply a light brown shade to your crease to add dimension. I used Naked from the original Urban Decay Naked palette.
4. Curl your lashes and apply loads of mascara. I used It Cosmetics Hello Lashes! mascara with Rimmel London ScandalEyes Curve Alert (I always layer this mascara for a dramatic fringe) on top for some serious lashes. You can also add falsies.
5. Add some highlight to the area by applying a white eyeshadow under your brow bone and in the inner corners of your eyes. I used Rimmel London’s ScandalEyes Cream Eyeshadow Stick in 001 Witness White.
6. To apply the red lip, either start with a red lip liner, or with a lip brush (as in my case), get some product on the tip of your brush then line your lips. Grab some more product on your brush then fill in your lips. Finally, with the actual lipstick, apply this as you would normally. Since red can be messy when you apply it, if you mess up, use concealer for touch ups.
If you aren’t a fan of red, you can swap it out for a bright fuchsia or orange if you are feeling like a bold lip.
Please note, this post contains products that were sent by PR for consideration. All opinions are my own.
Like what you read? Check out these related posts:
- It’s a scandal! Rimmel London ScandalEyes Eyeshadow Sticks
- The Lash Diaries: Rimmel London ScandalEyes Curve Alert mascara
- It Cosmetics Hello Lashes 5-in-1 mascara
- Falling leaves: a fall look featuring It Cosmetics